Embarking on a journey into the world of the Internet of Things (IoT) with a Raspberry Pi opens up a realm of possibilities. This guide, “How to Coding IoT Project with Raspberry Pi,” serves as your comprehensive companion, demystifying the process of creating intelligent and connected devices. From understanding the fundamental concepts of IoT to building sophisticated projects, we’ll navigate the landscape of hardware, software, and cloud integration, empowering you to transform ideas into reality.
This exploration will cover essential aspects, including hardware selection, software setup with programming languages like Python, sensor integration, data acquisition, network connectivity, cloud integration, and security considerations. Through practical examples, code snippets, and troubleshooting tips, you’ll gain the knowledge and skills needed to develop your own IoT projects, from simple temperature monitoring systems to more complex smart home applications. We will delve into essential hardware components, from sensors to networking modules, and master the art of data acquisition and processing.
Introduction to IoT and Raspberry Pi

The Internet of Things (IoT) is rapidly transforming how we interact with the world around us. This technology connects everyday objects to the internet, allowing them to collect, exchange, and act upon data. Raspberry Pi, a credit-card-sized computer, has become a cornerstone in developing and deploying IoT projects due to its affordability, versatility, and ease of use. This section provides a comprehensive overview of IoT, the Raspberry Pi, and their synergy in creating innovative solutions.
Fundamentals of the Internet of Things
The Internet of Things (IoT) refers to the network of physical objects—”things”—that are embedded with sensors, software, and other technologies for the purpose of connecting and exchanging data with other devices and systems over the internet. This allows these objects to be remotely monitored and controlled. The core concept involves extending internet connectivity beyond standard devices, such as computers and smartphones, to a diverse range of devices and everyday items.The fundamental components of an IoT system typically include:
- Sensors: These devices collect data from the environment, such as temperature, pressure, light, or motion.
- Connectivity: This enables the transmission of data, using technologies like Wi-Fi, Bluetooth, cellular networks (e.g., 4G, 5G), or specialized protocols like LoRaWAN.
- Data Processing: This involves processing the collected data, often done on the device itself (edge computing) or in the cloud.
- User Interface: This provides a means for users to interact with the system, view data, and control connected devices, often through mobile apps or web dashboards.
- Actuators: These are devices that can take action based on the data received, such as turning on a light, opening a door, or adjusting a thermostat.
Defining Raspberry Pi
A Raspberry Pi is a series of small, single-board computers developed in the United Kingdom by the Raspberry Pi Foundation. It’s designed to be affordable and accessible, making it an ideal tool for educational purposes and hobbyist projects. These devices are equipped with a processor, memory, and various input/output ports, allowing them to connect to peripherals like monitors, keyboards, and the internet.Key characteristics of a Raspberry Pi include:
- Compact Size: Typically the size of a credit card, making it easy to integrate into various projects.
- Affordability: Relatively inexpensive, making it accessible to a wide range of users.
- Versatility: Capable of running a variety of operating systems, including Linux-based distributions like Raspberry Pi OS (formerly Raspbian).
- Connectivity: Equipped with Wi-Fi, Bluetooth, Ethernet, and USB ports for connecting to networks and peripherals.
- GPIO Pins: General-Purpose Input/Output pins that allow the Raspberry Pi to interact with electronic components like sensors, LEDs, and motors.
Benefits of Using a Raspberry Pi for IoT Projects
Raspberry Pi offers numerous advantages that make it a preferred platform for developing and deploying IoT projects. These benefits contribute to its popularity among both beginners and experienced developers.Key advantages include:
- Cost-Effectiveness: Raspberry Pi devices are relatively inexpensive, reducing the overall cost of IoT projects, especially for prototyping and small-scale deployments.
- Ease of Use: The Raspberry Pi is easy to set up and program, with a large community providing extensive documentation, tutorials, and support.
- Versatility: It supports a wide range of programming languages (Python, C++, Java, etc.) and can be used for various IoT applications.
- Connectivity: Built-in Wi-Fi and Bluetooth capabilities simplify network connectivity and communication with other devices.
- GPIO Pins: GPIO pins allow for direct interaction with hardware components, such as sensors and actuators, enabling the creation of custom solutions.
- Community Support: A large and active community provides support, resources, and ready-made solutions, making it easier to troubleshoot problems and find inspiration.
- Low Power Consumption: Raspberry Pi devices consume minimal power, making them suitable for battery-powered or remote applications.
Common Applications of IoT and Raspberry Pi Utilization
The versatility of the Raspberry Pi makes it suitable for a wide array of IoT applications. Its ability to connect to the internet, process data, and interact with physical components opens doors to innovative solutions across various sectors.Here are some common applications:
- Home Automation: Raspberry Pi can be used to control and monitor various devices in a home, such as lights, thermostats, security systems, and appliances. For instance, a Raspberry Pi can be programmed to automatically turn on lights at sunset or adjust the thermostat based on occupancy.
- Smart Agriculture: In agriculture, Raspberry Pi can monitor soil moisture, temperature, and humidity levels, and automate irrigation systems. Farmers can receive real-time data and make informed decisions about watering and fertilization, leading to increased crop yields and reduced water waste.
- Environmental Monitoring: Raspberry Pi can be used to create environmental monitoring systems that collect data on air quality, water levels, and weather conditions. This data can be used to track pollution levels, predict floods, and provide early warnings of severe weather events.
- Industrial Automation: Raspberry Pi can be used to monitor and control industrial processes, such as manufacturing lines and warehouse operations. For example, a Raspberry Pi can monitor the temperature of a machine and send alerts if it exceeds a threshold, preventing breakdowns and downtime.
- Wearable Devices: The small size and low power consumption of the Raspberry Pi make it suitable for creating wearable devices, such as fitness trackers and smartwatches. These devices can collect data on user activity and health metrics, providing valuable insights into personal wellness.
- Smart City Applications: Raspberry Pi can be used in smart city projects to monitor traffic, manage parking, and collect data on public transportation usage. This data can be used to optimize traffic flow, improve public transportation services, and enhance the overall quality of life for residents.
Hardware Requirements and Setup
Building an IoT project with a Raspberry Pi requires a careful selection of hardware components and a systematic setup process. This section details the essential hardware, provides guidance on Raspberry Pi configuration, and Artikels the wiring process for sensor integration. Proper hardware selection and setup are crucial for the project’s functionality and reliability.
Essential Hardware Components
The following components are typically required for an IoT project using a Raspberry Pi. Choosing the right components depends on the specific project requirements, but this list provides a solid foundation.
- Raspberry Pi Board: This is the central processing unit (CPU) of your IoT project. Choose a model based on your project’s computational needs. Raspberry Pi 4 Model B is a popular choice, offering a good balance of performance and affordability. For simpler projects, older models like the Raspberry Pi 3 B+ can suffice.
- MicroSD Card: This stores the operating system (OS) and project files. A minimum of 8GB is recommended, but 16GB or 32GB cards are often preferred for additional storage space. Ensure the microSD card is class 10 or UHS-I for faster read/write speeds.
- Power Supply: A reliable power supply is critical. It should provide the correct voltage (typically 5V for most Raspberry Pi models) and sufficient current (amps) to power the Raspberry Pi and any connected peripherals.
- Network Connectivity: The Raspberry Pi needs to connect to the internet. This can be achieved through:
- Ethernet Cable: For a wired connection, use a standard Ethernet cable.
- Wi-Fi Adapter: Most Raspberry Pi models have built-in Wi-Fi. Ensure you have the Wi-Fi credentials available.
- Sensors and Actuators: These are the components that interact with the physical world. Examples include:
- Temperature Sensors (e.g., DHT11, DHT22, LM35): To measure temperature.
- Humidity Sensors (e.g., DHT11, DHT22): To measure humidity.
- Motion Sensors (e.g., PIR sensor): To detect movement.
- Light Sensors (e.g., LDR): To measure light intensity.
- Relay Modules: To control higher-voltage devices (e.g., lights, appliances).
- Breadboard and Jumper Wires: A breadboard provides a convenient way to connect electronic components without soldering. Jumper wires are used to connect the components to the Raspberry Pi.
- Enclosure (Optional): An enclosure protects the Raspberry Pi and connected components from environmental factors.
- USB Keyboard and Mouse (Optional, for initial setup): These are helpful for initial setup and troubleshooting.
- HDMI Monitor (Optional, for initial setup): Useful for viewing the Raspberry Pi’s output during the initial setup phase.
Setting Up a Raspberry Pi
Setting up a Raspberry Pi involves installing the operating system, configuring the network, and enabling necessary services.
- OS Installation:
- Download the Raspberry Pi OS (Raspberry Pi OS with desktop and recommended software is a good starting point) from the official Raspberry Pi website.
- Use a program like Raspberry Pi Imager (recommended) or BalenaEtcher to write the OS image to the microSD card.
- Insert the microSD card into the Raspberry Pi.
- Network Configuration:
- Wi-Fi: If using Wi-Fi, configure the Wi-Fi settings during the initial setup process in Raspberry Pi Imager (recommended) or by editing the `wpa_supplicant.conf` file on the microSD card before booting. The configuration usually involves specifying the SSID (network name) and password.
- Ethernet: If using Ethernet, connect the Raspberry Pi to the network using an Ethernet cable. The Raspberry Pi will typically obtain an IP address automatically via DHCP.
- SSH (Secure Shell): Enable SSH to access the Raspberry Pi remotely. This can be done during the OS installation process (recommended) or by creating an empty file named `ssh` in the boot partition of the microSD card before booting the Raspberry Pi.
- Initial Boot and Configuration:
- Connect the Raspberry Pi to a power supply.
- The Raspberry Pi will boot and start the OS.
- If you have a monitor and keyboard connected, you can configure the Raspberry Pi directly. Otherwise, you can access it remotely via SSH.
- Update the system packages: Open a terminal (either locally or via SSH) and run the command `sudo apt update && sudo apt upgrade`.
- Configure the Raspberry Pi using the `raspi-config` utility: Run `sudo raspi-config` in the terminal to change settings such as hostname, password, and time zone. Enable the I2C and SPI interfaces if needed for sensor communication.
Basic Wiring Diagram for Connecting Sensors
Connecting sensors to a Raspberry Pi typically involves connecting the sensor’s data, power, and ground pins to the corresponding pins on the Raspberry Pi’s GPIO (General Purpose Input/Output) header. The specific wiring depends on the sensor type.Consider the example of connecting a DHT11 temperature and humidity sensor. The DHT11 has three or four pins: VCC (power), GND (ground), and DATA.
Wiring Diagram Example (DHT11 to Raspberry Pi):
Components:
- DHT11 Temperature and Humidity Sensor
- Raspberry Pi
- Breadboard
- Jumper Wires
Wiring:
- Connect the DHT11’s VCC pin to the Raspberry Pi’s 3.3V or 5V pin (check the sensor’s datasheet for voltage requirements).
- Connect the DHT11’s GND pin to the Raspberry Pi’s GND pin.
- Connect the DHT11’s DATA pin to a GPIO pin on the Raspberry Pi (e.g., GPIO 4).
- Optionally, add a 10kΩ pull-up resistor between the DATA pin and the 3.3V pin on the Raspberry Pi. This is recommended for DHT11 sensors.
Explanation:
This setup allows the Raspberry Pi to read data from the DHT11 sensor. The GPIO pin is configured as an input to receive the data signal. The pull-up resistor ensures a defined voltage level when the DATA line is not actively driven by the sensor.
Note: Always refer to the sensor’s datasheet for pinout information and voltage requirements.
Recommended Power Supplies and Specifications
A reliable power supply is essential for the stable operation of the Raspberry Pi. Using an underpowered or unstable power supply can lead to issues like system crashes, data corruption, and hardware damage.The following table provides a list of recommended power supplies and their specifications. The specifications are based on the Raspberry Pi model and the anticipated power consumption of connected peripherals.
| Raspberry Pi Model | Voltage | Minimum Current | Connector Type | Notes |
|---|---|---|---|---|
| Raspberry Pi 4 Model B | 5V | 3A | USB-C | Recommended for optimal performance. Use a high-quality USB-C cable. |
| Raspberry Pi 3 Model B+ | 5V | 2.5A | Micro-USB | Sufficient for most projects. |
| Raspberry Pi Zero/Zero W | 5V | 1A | Micro-USB | Suitable for smaller projects with limited peripherals. |
| Raspberry Pi Pico | 5V | 0.5A (USB) | Micro-USB | Can be powered from a computer’s USB port. |
Important Considerations:
- Quality: Purchase power supplies from reputable manufacturers to ensure reliability and safety.
- Cable Quality: Use high-quality USB cables, especially for the Raspberry Pi 4, as the cable can affect the voltage drop.
- Overcurrent Protection: Some power supplies include overcurrent protection, which can prevent damage to the Raspberry Pi in case of a short circuit.
- Power Consumption: The current requirements may increase depending on the number and type of connected peripherals. Factor in the power consumption of all components when selecting a power supply. For example, a USB hard drive can draw a significant amount of power.
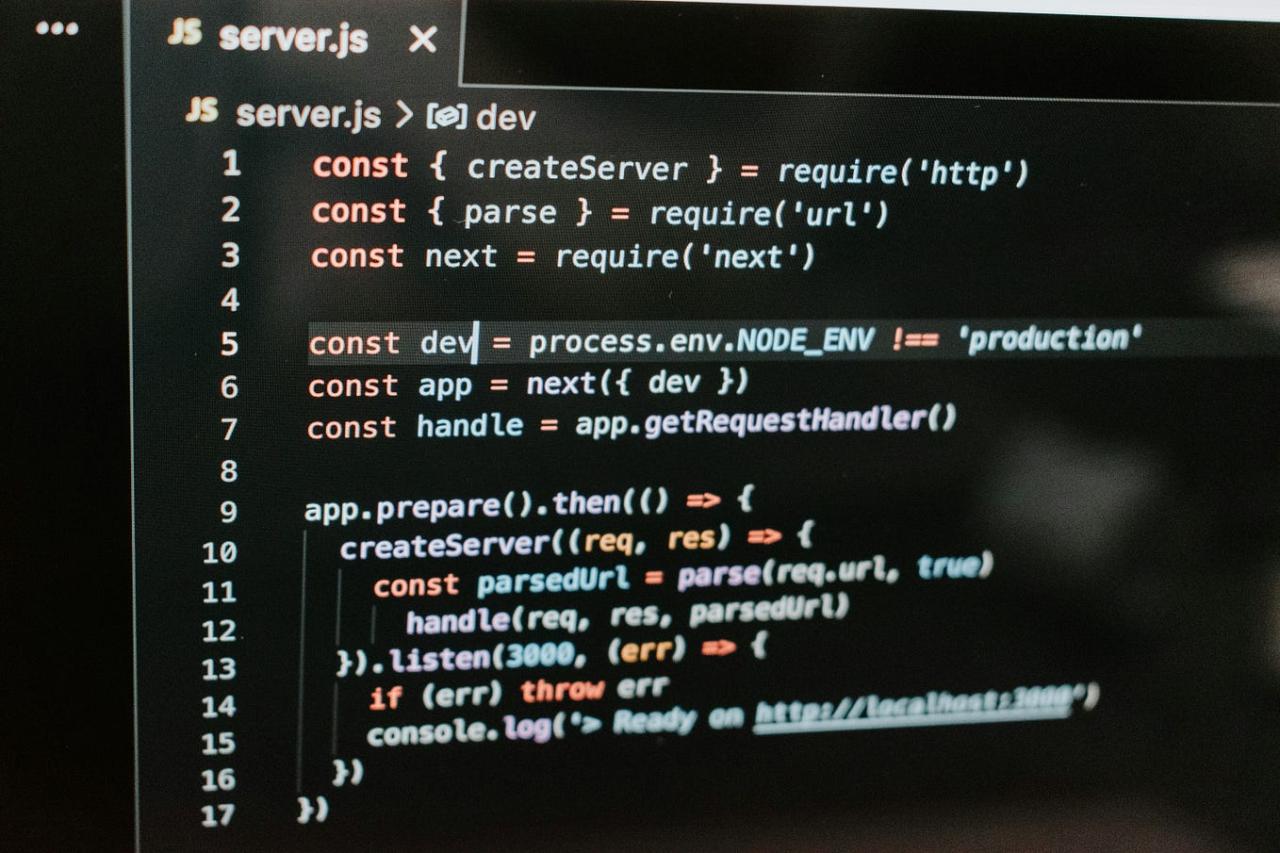
Software and Programming Languages
Developing IoT projects on the Raspberry Pi necessitates a solid understanding of software and programming languages. The choice of language significantly impacts project complexity, performance, and development time. This section explores popular programming languages used in Raspberry Pi IoT projects, provides a practical Python example for sensor data acquisition, demonstrates library installation, and discusses the advantages and disadvantages of each language.
Popular Programming Languages for Raspberry Pi IoT Projects
Several programming languages are commonly employed in Raspberry Pi IoT development. Each offers distinct advantages and disadvantages, influencing the development process.
- Python: Python is a high-level, interpreted language known for its readability and extensive libraries. It’s a popular choice for beginners and experienced developers due to its ease of use and large community support. It’s well-suited for rapid prototyping and projects involving data analysis and machine learning.
- C/C++: C and C++ are low-level languages that offer excellent performance and control over hardware. They are often used in resource-constrained environments or when high-speed processing is required. While they have a steeper learning curve than Python, they provide greater flexibility and efficiency.
- Node.js (JavaScript): Node.js allows developers to use JavaScript on the server-side, making it possible to build full-stack applications with a single language. It’s suitable for building web-based interfaces and handling real-time data streams.
- Java: Java is a platform-independent language that is widely used in enterprise applications. It’s suitable for building robust and scalable IoT solutions.
Code Example (Python) for Reading Data from a Simple Sensor
Python’s simplicity and numerous libraries make it ideal for interacting with sensors. The following example demonstrates how to read temperature data from a DHT11 temperature and humidity sensor connected to a Raspberry Pi.
Prerequisites:
- A Raspberry Pi.
- A DHT11 temperature and humidity sensor.
- Connecting wires.
Python Code:
This code utilizes the adafruit-circuitpython-dht library to read temperature and humidity from a DHT11 sensor connected to a GPIO pin on the Raspberry Pi. Replace 17 with the actual GPIO pin number your sensor is connected to.
import board
import adafruit_dht
import time

# Initialize the DHT11 sensor
dht_device = adafruit_dht.DHT11(board.D17) # Replace D17 with the GPIO pin number

try:
    while True:
        try:
            # Read temperature and humidity
            temperature_c = dht_device.temperature
            humidity = dht_device.humidity
            # Print the values
            print(f"Temperature: temperature_c:.1f C")
            print(f"Humidity: humidity:.1f %")

        except RuntimeError as error:
            # Errors happen incredibly fast, try again
            print(error.args)
            time.sleep(2.0)

        time.sleep(2.0) # Wait for 2 seconds before reading again

except KeyboardInterrupt:
    print("Program stopped by user.")
Demonstration of Installing Necessary Libraries and Dependencies for Sensor Communication
Installing libraries is a crucial step in utilizing sensors with the Raspberry Pi. This example focuses on installing the required library for the DHT11 sensor used in the previous example.
Installation Steps (using pip):
Pip is Python’s package installer. It simplifies the process of installing libraries.
- Update Package Lists: Before installing any new packages, it’s recommended to update the package lists. Open a terminal on your Raspberry Pi and run the following command:
- Install pip if necessary: Some Raspberry Pi OS distributions might not have pip installed by default. Install it using the following command:
- Install the adafruit-circuitpython-dht library: Use pip to install the necessary library for the DHT11 sensor. Open a terminal and run:
- Verify Installation: After installation, you can verify it by importing the library in a Python script or by checking the library’s presence in the Python environment.
sudo apt update
sudo apt install python3-pip
pip3 install adafruit-circuitpython-dht
Advantages and Disadvantages of Different Programming Languages for IoT
Each programming language has its own set of strengths and weaknesses, influencing its suitability for different IoT projects.
| Language | Advantages | Disadvantages |
|---|---|---|
| Python |
|
|
| C/C++ |
|
|
| Node.js (JavaScript) |
|
|
| Java |
|
|
Sensor Selection and Integration
Sensors are the eyes and ears of any IoT project, providing the critical data needed to understand and interact with the physical world. Choosing the right sensors is paramount to the success of your project, as it directly impacts the accuracy, reliability, and functionality of your system. This section guides you through the process of selecting and integrating sensors for your Raspberry Pi-based IoT applications.
Selecting Suitable Sensors for IoT Applications
The selection of sensors depends heavily on the specific application. Consider factors like the type of data needed, the environment in which the sensor will operate, and the required accuracy and precision.
Here are key aspects to consider when selecting sensors:
- Application Requirements: Define the specific data your project needs to collect. For example, a smart home project might require temperature, humidity, and motion sensors. A weather station might require temperature, humidity, pressure, and wind speed sensors.
- Measurement Range: Ensure the sensor’s measurement range covers the expected values. A temperature sensor for a greenhouse needs a different range than one for a refrigerator.
- Accuracy and Precision: Determine the required level of accuracy and precision for your application. High-precision applications may require more expensive sensors.
- Environmental Conditions: Consider the operating environment, including temperature, humidity, and exposure to elements. Select sensors rated for the conditions.
- Interface Compatibility: Verify the sensor’s interface (e.g., I2C, SPI, digital, or analog) is compatible with your Raspberry Pi and the available GPIO pins.
- Power Requirements: Check the sensor’s power consumption and ensure your Raspberry Pi can provide sufficient power.
- Cost: Evaluate the cost of the sensor and its impact on the overall project budget.
- Availability and Documentation: Choose sensors with readily available documentation, libraries, and community support.
Common Sensor Types
A wide variety of sensors are available for IoT projects, each designed to measure different physical parameters.
Some of the most common sensor types include:
- Temperature Sensors: Measure the temperature of the environment. Common examples include the DHT11, DHT22, and DS18B20.
- Humidity Sensors: Measure the amount of water vapor in the air. Often combined with temperature sensors.
- Pressure Sensors: Measure atmospheric pressure. Useful for weather monitoring and altitude determination.
- Motion Sensors: Detect movement. Often based on passive infrared (PIR) technology.
- Light Sensors: Measure the intensity of light.
- Proximity Sensors: Detect the presence of an object without physical contact.
- Gas Sensors: Detect the presence and concentration of various gases.
- Water Quality Sensors: Measure various water quality parameters.
Sensor Specifications Table
This table provides specifications for several common sensor types. Note that the specific values can vary depending on the manufacturer and model.
| Sensor Type | Measurement Range | Accuracy | Interface |
|---|---|---|---|
| DHT11 (Temperature/Humidity) | Temperature: 0-50°C; Humidity: 20-90% RH | Temperature: ±2°C; Humidity: ±5% RH | Digital (Single-Wire) |
| DHT22 (Temperature/Humidity) | Temperature: -40-80°C; Humidity: 0-100% RH | Temperature: ±0.5°C; Humidity: ±2-3% RH | Digital (Single-Wire) |
| BMP280 (Pressure/Temperature) | Pressure: 300-1100 hPa; Temperature: -40 to +85 °C | Pressure: ±1.0 hPa; Temperature: ±1.0 °C | I2C, SPI |
| DS18B20 (Temperature) | -55°C to +125°C | ±0.5°C | Digital (Single-Wire) |
| PIR Motion Sensor | Detection Range: Typically up to 10 meters | N/A (Binary Output) | Digital |
Connecting and Configuring a DHT11 Sensor
The DHT11 is a popular, low-cost sensor that measures temperature and humidity. It is a good starting point for learning about sensor integration.
Here are the steps to connect and configure a DHT11 sensor:
- Hardware Connections:
- Connect the VCC pin of the DHT11 to the 3.3V or 5V pin on the Raspberry Pi (check your DHT11 datasheet).
- Connect the GND pin of the DHT11 to a GND pin on the Raspberry Pi.
- Connect the DATA pin of the DHT11 to a GPIO pin on the Raspberry Pi (e.g., GPIO4). Include a 10k pull-up resistor between the DATA pin and the 3.3V pin on the DHT11.
- Software Installation:
- Install the necessary Python library. Use the following command in the terminal:
pip install Adafruit_DHT.
- Install the necessary Python library. Use the following command in the terminal:
- Python Code Example:
- Create a Python script (e.g.,
dht11_example.py) to read data from the DHT11. - Import the necessary library:
import Adafruit_DHT. - Define the GPIO pin connected to the DHT11’s data pin:
sensor = Adafruit_DHT.DHT11andpin = 4. - Read the sensor data using:
humidity, temperature = Adafruit_DHT.read_retry(sensor, pin). Theread_retryfunction attempts to read the sensor data multiple times if it fails initially. - Print the temperature and humidity readings:
if humidity is not None and temperature is not None:
print('Temp=0:0.1f*C Humidity=1:0.1f%'.format(temperature, humidity))
else:
print('Failed to get reading.Try again!')
- Create a Python script (e.g.,
- Running the Script:
- Execute the Python script from the terminal:
sudo python dht11_example.py. The `sudo` command is used to run the script with elevated privileges, which might be needed to access the GPIO pins. - The script will print the temperature and humidity readings to the console.
- Execute the Python script from the terminal:
The above example provides a foundation for interacting with various sensors. The specific wiring and software requirements will vary depending on the sensor. Always consult the sensor’s datasheet for detailed information. For instance, if you are building a smart home system, you might use multiple DHT22 sensors to monitor temperature and humidity in different rooms, sending the data to a cloud platform for analysis and control.
Data Acquisition and Processing

The ability to collect and process data is fundamental to any IoT project. This section delves into the methods for acquiring sensor data using Python, the techniques for processing this raw data into meaningful information, and the various options for storing the processed data for later analysis and use. The practical application of these concepts will be demonstrated through a code example focused on data logging with timestamps.
Collecting Data from Sensors with Python
Python, due to its extensive libraries and ease of use, is a popular choice for interacting with sensors on a Raspberry Pi. This involves reading data from the sensor’s output, which could be analog (voltage) or digital (serial communication). The specific method varies depending on the sensor type and its interface.
- Analog Sensors: Analog sensors typically output a voltage that corresponds to the measured physical quantity. To read this voltage, an Analog-to-Digital Converter (ADC) is required, as the Raspberry Pi’s GPIO pins are digital. Libraries like `RPi.GPIO` (for basic GPIO control) and those specific to your ADC (e.g., `ADS1115` for the ADS1115 ADC) are used to read the analog voltage and convert it to a digital value.
For instance, to read a temperature sensor connected to an ADC, the Python code might involve:
- Initializing the ADC.
- Reading the voltage from the ADC’s channel connected to the sensor.
- Converting the voltage to a temperature reading using the sensor’s datasheet calibration data.
- Digital Sensors: Digital sensors communicate using protocols like I2C or SPI. Libraries such as `smbus` (for I2C) and `spidev` (for SPI) are used to interact with these sensors. The process typically involves:
- Initializing the I2C or SPI interface.
- Sending commands to the sensor to request data.
- Receiving the data from the sensor, which is often a numerical value.
For example, to read a digital temperature and humidity sensor using I2C, the Python code might involve:
- Specifying the sensor’s I2C address.
- Sending a command to the sensor to read temperature and humidity.
- Reading the data from the sensor, which might require combining multiple bytes.
- Converting the raw data into temperature and humidity values using the sensor’s datasheet formulas.
Methods for Processing Raw Sensor Data
Raw sensor data often needs processing to improve accuracy and make it usable. This processing can involve several techniques.
- Filtering: Filtering removes noise and unwanted variations from the data. Common filtering techniques include:
- Moving Average: This calculates the average of a set number of recent data points. It smooths out short-term fluctuations.
Example: Calculating the moving average of temperature readings over the last 5 minutes.
- Median Filtering: This replaces each data point with the median of its surrounding data points. It is effective at removing spikes or outliers.
Example: Removing erroneous temperature readings caused by brief interference.
- Kalman Filtering: A more advanced technique that uses a series of measurements observed over time, containing noise (random variations) and other inaccuracies, and produces estimates of unknown variables that tend to be more precise than those based on a single measurement alone.
Example: Tracking the position of a moving object based on noisy sensor data.
- Moving Average: This calculates the average of a set number of recent data points. It smooths out short-term fluctuations.
- Calibration: Calibration corrects for sensor inaccuracies. This involves comparing the sensor’s readings to known, accurate values and applying a correction factor.
Example: Calibrating a pressure sensor by comparing its readings to a known pressure standard and adjusting the readings accordingly.
- Unit Conversion: Converting the raw sensor readings to the desired units.
Example: Converting the raw data from a temperature sensor (e.g., in degrees Celsius) to degrees Fahrenheit.
Data Storage Examples
The choice of data storage depends on the project’s requirements. Several options are available, each with its advantages and disadvantages.
- Local File Storage: Storing data in a local file (e.g., CSV, text file) is suitable for small-scale projects or for initial data collection. This method is simple to implement but can become cumbersome for large datasets.
Example: Logging temperature and humidity readings to a CSV file on the Raspberry Pi’s SD card.
- Cloud Databases: Cloud databases (e.g., AWS IoT, Google Cloud IoT, Azure IoT Hub) provide scalability, accessibility, and data analysis capabilities. These services offer secure storage and allow for remote access to the data.
Example: Sending sensor data to an AWS IoT service for real-time monitoring and analysis.
- Local Databases: Databases like SQLite can store data locally on the Raspberry Pi. They offer more structured storage than simple files and allow for querying and data manipulation.
Example: Storing sensor readings in a SQLite database for later analysis and reporting.
Code Example for Data Logging with Timestamps
This Python code example demonstrates how to read data from a hypothetical sensor, process it, and log it to a local CSV file with timestamps. It assumes a sensor providing a temperature reading.
“`python
import time
import csv
# Define sensor reading function (replace with actual sensor reading)
def read_temperature():
“””Simulates reading temperature from a sensor.”””
# Replace this with your sensor reading code
return 25.5 + (0.5
– (time.time() % 10)) # Simulate temperature readings
# Define the file name
log_file = “sensor_data.csv”
try:
while True:
# Read temperature
temperature = read_temperature()
# Get current timestamp
timestamp = time.strftime(“%Y-%m-%d %H:%M:%S”, time.localtime())
# Log the data
with open(log_file, mode=”a”, newline=””) as file:
writer = csv.writer(file)
writer.writerow([timestamp, temperature])
print(f”[timestamp] Temperature: temperature:.2f °C”)
# Wait for a period (e.g., 5 seconds)
time.sleep(5)
except KeyboardInterrupt:
print(“Data logging stopped.”)
“`
The code performs the following steps:
- Import necessary libraries: `time` for timestamps and `csv` for writing to CSV files.
- `read_temperature()` function: This function simulates reading data from a sensor. In a real-world scenario, you would replace this with the code that reads from your specific sensor.
- Define the file name: Sets the name of the CSV file to store the logged data.
- Main loop:
- Reads the temperature using the `read_temperature()` function.
- Gets the current timestamp using `time.strftime()`.
- Opens the CSV file in append mode (`”a”`) and writes the timestamp and temperature to a new row.
- Prints the logged data to the console for monitoring.
- Pauses for 5 seconds using `time.sleep()`.
- Error Handling: Includes a `KeyboardInterrupt` exception to gracefully stop the data logging when Ctrl+C is pressed.
This example demonstrates a basic data logging process. You can adapt it to include more sensors, more sophisticated data processing, and different storage methods.
Network Connectivity and Communication Protocols

Connecting your Raspberry Pi to a network is crucial for IoT projects, enabling data transmission and remote control. This section covers various network connectivity options and essential communication protocols. Understanding these aspects allows for seamless integration of your Raspberry Pi into a connected ecosystem.
Network Connectivity Options
The Raspberry Pi offers several methods for connecting to a network, each with its advantages. Choosing the right option depends on your project’s requirements and the available infrastructure.
- Wi-Fi: Wi-Fi provides wireless connectivity, making the Raspberry Pi portable and flexible. It’s ideal for projects where physical cabling is inconvenient or impossible. Setting up Wi-Fi typically involves configuring the network name (SSID) and password.
- Ethernet: Ethernet offers a wired connection, providing a more stable and reliable network connection, especially in environments with potential Wi-Fi interference. This option often delivers higher data transfer speeds. You connect the Raspberry Pi to a network using an Ethernet cable.
- Cellular (via USB dongle or HAT): For projects in areas without Wi-Fi or Ethernet, cellular connectivity can be established using a USB cellular modem or a dedicated cellular HAT (Hardware Attached on Top) for the Raspberry Pi. This method uses a SIM card to connect to a cellular network, providing internet access. This is especially useful for projects in remote locations.
Communication Protocols Basics
Communication protocols are the language that devices use to exchange data over a network. Selecting the right protocol depends on the project’s needs, considering factors like data size, frequency of communication, and security requirements.
- MQTT (Message Queuing Telemetry Transport): MQTT is a lightweight, publish-subscribe messaging protocol ideal for IoT applications. It’s designed for devices with limited resources and bandwidth. MQTT uses a broker to manage messages, where devices publish data to specific topics, and other devices subscribe to those topics to receive the data.
- HTTP (Hypertext Transfer Protocol): HTTP is the foundation of data communication for the World Wide Web. It uses a client-server model, where a client (like a Raspberry Pi) sends requests to a server, and the server responds with data. HTTP is suitable for simpler data exchanges and web-based interfaces.
- CoAP (Constrained Application Protocol): CoAP is a specialized protocol for constrained devices, such as those in IoT, with a focus on low overhead and resource efficiency. It is designed for machine-to-machine communication, particularly where bandwidth and processing power are limited.
Setting up MQTT for Data Transmission
MQTT’s publish-subscribe model makes it well-suited for IoT projects. Here’s a demonstration of setting up MQTT on your Raspberry Pi.
1. Install the MQTT Client: Install the `paho-mqtt` Python library using pip.
sudo pip3 install paho-mqtt
2. Choose an MQTT Broker: You can use a public MQTT broker (like `test.mosquitto.org` for testing) or set up your own broker (Mosquitto is a popular choice).
3. Python Code Example (Publisher): Create a Python script to publish data to an MQTT broker.
import paho.mqtt.client as mqtt
import time

# Broker details
broker_address = "test.mosquitto.org"  # Or your broker address
port = 1883
topic = "rpi/temperature"

# Callback for connection
def on_connect(client, userdata, flags, rc):
    if rc == 0:
        print("Connected to MQTT Broker!")
    else:
        print("Failed to connect, return code %d\n", rc)

# Create a client instance
client = mqtt.Client()
client.on_connect = on_connect

# Connect to the broker
client.connect(broker_address, port=port)

try:
    while True:
        temperature = 25 + (time.time() % 5)  # Simulate temperature data
        client.publish(topic, str(temperature))
        print(f"Published: temperature to topic topic")
        time.sleep(5) # Send data every 5 seconds

except KeyboardInterrupt:
    print("Exiting...")
    client.disconnect()
4.
Python Code Example (Subscriber): Create a Python script to subscribe to the topic and receive data.
import paho.mqtt.client as mqtt

# Broker details
broker_address = "test.mosquitto.org"  # Or your broker address
port = 1883
topic = "rpi/temperature"

# Callback for when a message is received
def on_message(client, userdata, message):
    print(f"Received message: str(message.payload.decode('utf-8')) from topic message.topic")

# Callback for connection
def on_connect(client, userdata, flags, rc):
    if rc == 0:
        print("Connected to MQTT Broker!")
        client.subscribe(topic)
    else:
        print("Failed to connect, return code %d\n", rc)

# Create a client instance
client = mqtt.Client()
client.on_connect = on_connect
client.on_message = on_message

# Connect to the broker
client.connect(broker_address, port=port)

# Start the MQTT client
client.loop_forever()
5.
Run the Scripts: Execute the publisher script on your Raspberry Pi. Then, run the subscriber script in a separate terminal or on another device to receive the published temperature data.
Implementing HTTP Requests Example
HTTP requests allow the Raspberry Pi to interact with web servers, such as sending data to a cloud service or retrieving information from an API.
The example uses Python and the `requests` library to send a POST request.
import requests
import json

# API endpoint (replace with your API endpoint)
url = "https://your-api-endpoint.com/data"

# Data to send
data =
    "sensor_id": "rpi001",
    "temperature": 27.5,
    "timestamp": "2024-01-26T10:00:00Z"


# Convert data to JSON
json_data = json.dumps(data)

# Headers (specifying content type)
headers = 'Content-type': 'application/json'

try:
    response = requests.post(url, data=json_data, headers=headers)

    if response.status_code == 200:
        print("Data sent successfully!")
        print(response.text) # Display the response from the server
    else:
        print(f"Error sending data. Status code: response.status_code")
        print(response.text) # Display the error message
except requests.exceptions.RequestException as e:
    print(f"An error occurred: e")
Cloud Integration and Data Visualization
Integrating your Raspberry Pi projects with cloud platforms unlocks a new dimension of possibilities, allowing for remote monitoring, data storage, advanced analysis, and control. This section delves into the process of connecting your Raspberry Pi to popular cloud services, configuring them for IoT applications, and visualizing the collected data. Understanding cloud integration is essential for building scalable and robust IoT solutions.
Cloud Platform Integration
The integration of your Raspberry Pi with cloud platforms provides a centralized location for storing, processing, and analyzing data from your sensors. This capability allows for remote access and control of your IoT devices from anywhere with an internet connection.
Cloud platforms offer a range of services designed specifically for IoT applications, including device management, data storage, real-time data processing, and data visualization. Popular choices include:
- Amazon Web Services (AWS): AWS provides a comprehensive suite of IoT services, including AWS IoT Core for device connectivity, AWS IoT Analytics for data processing, and AWS IoT SiteWise for industrial applications. AWS offers a robust and scalable infrastructure suitable for a wide range of IoT projects. For instance, you could use AWS IoT Core to securely connect your Raspberry Pi to the cloud, AWS Lambda to process incoming sensor data, and Amazon S3 to store the data for long-term archival.
- Microsoft Azure: Azure IoT Hub provides a secure and scalable platform for connecting and managing IoT devices. Azure also offers Azure Stream Analytics for real-time data processing, Azure Data Lake Storage for data storage, and Azure IoT Central for simplified device management and data visualization. Azure is a strong choice for organizations already invested in Microsoft technologies. An example would be using Azure IoT Hub to register your Raspberry Pi, Azure Functions to transform the sensor data, and Azure Cosmos DB to store the data.
- Google Cloud Platform (GCP): GCP offers a variety of IoT services, including Cloud IoT Core for device management, Cloud Pub/Sub for real-time data streaming, and BigQuery for data warehousing and analysis. GCP is known for its powerful data analytics capabilities. For example, you could use Cloud IoT Core to connect your Raspberry Pi, Cloud Functions to process the sensor data, and BigQuery to analyze the data to gain insights.
Setting Up a Cloud Account and Configuring IoT Services
Each cloud platform has its specific steps for setting up an account and configuring IoT services. Here’s a general guide, although the specifics may vary:
- Account Creation: Create an account on the chosen cloud platform (AWS, Azure, or GCP). This typically involves providing an email address, creating a password, and entering payment information.
- Service Selection: Within the cloud platform, navigate to the IoT or device management services. For example, in AWS, you would go to the AWS IoT Core console. In Azure, you would go to the Azure IoT Hub service. In GCP, you would go to the Cloud IoT Core console.
- Device Registration: Register your Raspberry Pi as a device within the selected IoT service. This usually involves generating a unique device ID and setting up authentication credentials (e.g., certificates, keys). This ensures that only authorized devices can connect to your cloud platform.
- Configuration: Configure the necessary settings for your device, such as the communication protocol (MQTT, HTTP, etc.), data format (JSON, CSV, etc.), and data ingestion rules.
- Security: Implement robust security measures, including using secure communication protocols (TLS/SSL), rotating keys, and managing access control.
Sending Sensor Data to a Cloud Platform
The process of sending sensor data from your Raspberry Pi to a cloud platform typically involves the following steps:
- Install Required Libraries: Install the necessary libraries and SDKs for your chosen cloud platform on your Raspberry Pi. For example, you would install the AWS IoT Device SDK for Python if you are using AWS.
- Establish a Connection: Establish a secure connection to the cloud platform using the device’s authentication credentials.
- Collect Sensor Data: Read the data from your connected sensors.
- Format the Data: Format the sensor data into a suitable format, such as JSON.
- Publish the Data: Publish the data to the cloud platform using the appropriate communication protocol (e.g., MQTT).
Example (using MQTT and AWS IoT Core, Python):
“`python
import paho.mqtt.client as mqtt
import json
import time
# Replace with your AWS IoT endpoint and credentials
endpoint = “YOUR_ENDPOINT.amazonaws.com”
client_id = “raspberrypi-client”
topic = “my/topic”
cert_path = “path/to/your/certificate.pem.crt”
private_key_path = “path/to/your/private.pem.key”
ca_path = “path/to/your/rootCA.pem”
def on_connect(client, userdata, flags, rc):
if rc == 0:
print(“Connected to AWS IoT”)
else:
print(f”Connection failed, return code rc”)
def on_publish(client, userdata, mid):
print(“Message Published”)
client = mqtt.Client(client_id)
client.on_connect = on_connect
client.on_publish = on_publish
client.tls_set(ca_certs=ca_path, certfile=cert_path, keyfile=private_key_path, tls_version=ssl.PROTOCOL_TLSv1_2)
client.connect(endpoint, 8883, 60)
client.loop_start()
try:
while True:
# Simulate sensor data
temperature = 25 + (random.random()
– 5)
humidity = 60 + (random.random()
– 10)
data =
“temperature”: temperature,
“humidity”: humidity,
“timestamp”: time.time()
payload = json.dumps(data)
client.publish(topic, payload)
print(f”Published: payload”)
time.sleep(5)
except KeyboardInterrupt:
print(“Exiting…”)
client.loop_stop()
client.disconnect()
“`
In this example:
- The code uses the `paho-mqtt` library to communicate via MQTT.
- It connects to your AWS IoT endpoint using your device’s certificate and private key.
- Simulated sensor data is generated.
- The data is formatted as JSON.
- The JSON data is published to a specific topic.
Data Visualization Tools
Data visualization tools are essential for making sense of the data collected from your IoT devices. These tools allow you to create dashboards, charts, and graphs that provide insights into your data. Several options are available, both cloud-based and open-source:
- Cloud Platform Dashboards: Most cloud platforms offer built-in data visualization tools. AWS IoT Analytics, Azure IoT Central, and Google Cloud Data Studio are examples of such tools. These tools often integrate seamlessly with the cloud services, making it easy to visualize data stored within the platform.
- Grafana: Grafana is a powerful open-source data visualization platform that can be used to create dashboards from various data sources, including time-series databases and cloud platforms. Grafana is highly customizable and supports a wide range of data sources. It is a versatile tool suitable for a broad array of use cases.
- ThingsBoard: ThingsBoard is an open-source IoT platform that offers data collection, processing, visualization, and device management capabilities. It provides a user-friendly interface for creating dashboards and visualizing data.
- Node-RED: Node-RED is a flow-based programming tool that can be used to build IoT applications. It offers a visual interface for connecting various nodes, including data sources, processing functions, and visualization components.
- Tableau: Tableau is a popular data visualization tool known for its user-friendly interface and powerful analytical capabilities. It supports a wide range of data sources and allows for the creation of interactive dashboards and reports.
- Python Libraries (Matplotlib, Seaborn, Plotly): Python libraries like Matplotlib, Seaborn, and Plotly can be used to create static and interactive visualizations. These libraries offer flexibility and control over the visualization process, but they require programming knowledge.
Choosing the right data visualization tool depends on your specific needs and the complexity of your project. Consider factors such as the platform’s ease of use, the available features, and the integration with your cloud platform and data sources. For example, a simple project might benefit from the built-in dashboards of your cloud platform, while a more complex project with advanced analysis requirements might benefit from using Grafana or Tableau.
Security Considerations for IoT Projects

The Internet of Things (IoT) introduces unprecedented connectivity, but this also expands the attack surface. Securing IoT projects, especially those built on platforms like the Raspberry Pi, is paramount. Failure to do so can lead to data breaches, device compromise, and even physical harm. Understanding and mitigating security risks is not optional; it is a fundamental requirement for any successful and responsible IoT deployment.
Common Security Vulnerabilities in IoT Devices
IoT devices, including those powered by Raspberry Pi, are susceptible to a variety of security vulnerabilities. These vulnerabilities can be exploited by malicious actors to gain unauthorized access, steal data, or disrupt device functionality. Understanding these weaknesses is the first step towards building secure IoT solutions.
- Weak Passwords and Default Credentials: Many IoT devices ship with default usernames and passwords that are easily guessable. Attackers often exploit these known credentials to gain initial access.
- Unencrypted Communication: Data transmitted between IoT devices and the cloud, or between devices themselves, is often unencrypted. This leaves sensitive information vulnerable to interception and eavesdropping.
- Outdated Software and Firmware: IoT devices frequently lack regular software updates. This leaves them exposed to known vulnerabilities that have been patched in newer versions.
- Lack of Physical Security: Devices deployed in public or easily accessible locations can be physically tampered with, allowing attackers to extract data or compromise the device’s functionality.
- Insufficient Input Validation: IoT devices may not adequately validate user inputs, making them susceptible to injection attacks, such as SQL injection or command injection.
- Insecure APIs: Application Programming Interfaces (APIs) used to interact with IoT devices may have security flaws, allowing attackers to access sensitive data or control device functions.
- Side-Channel Attacks: Attackers can exploit side-channel information, such as power consumption or electromagnetic emissions, to extract cryptographic keys or other sensitive information.
Recommendations for Securing a Raspberry Pi
Securing a Raspberry Pi for an IoT project involves several crucial steps, encompassing both software and hardware configurations. Implementing these measures significantly reduces the risk of compromise.
- Strong Password Management:
- Change Default Credentials: Immediately change the default username (e.g., ‘pi’) and password. Choose a strong, unique password that is at least 12 characters long, including a mix of uppercase and lowercase letters, numbers, and symbols.
- Use a Password Manager: Consider using a password manager to securely store and generate strong passwords.
- Regular Password Rotation: Change passwords periodically to minimize the impact of a potential breach.
- Enable Encryption:
- Encrypt Sensitive Data: Use encryption to protect sensitive data stored on the Raspberry Pi, such as configuration files and user data. Consider full disk encryption using tools like LUKS.
- Secure Communication: Employ secure communication protocols like HTTPS for web traffic, SSH for remote access, and TLS/SSL for data transmission.
- Keep Software Updated:
- Regular Updates: Regularly update the Raspberry Pi’s operating system (Raspberry Pi OS) and all installed software packages. Use the `apt update` and `apt upgrade` commands.
- Automated Updates: Consider configuring automatic security updates to ensure the system is patched against known vulnerabilities.
- Network Security:
- Firewall Configuration: Configure a firewall (e.g., `iptables` or `ufw`) to restrict network access and block unwanted traffic.
- Network Segmentation: If possible, isolate the Raspberry Pi on a separate network segment to limit the impact of a potential compromise.
- Disable Unnecessary Services: Disable any services that are not required for the IoT project to reduce the attack surface.
- Secure Boot (if supported): If the Raspberry Pi model supports it, consider enabling secure boot to ensure that only trusted software is loaded during startup.
- Physical Security:
- Secure Physical Access: If the Raspberry Pi is deployed in a public or accessible location, secure the device physically to prevent tampering. Consider using a locked enclosure.
- Disable Unnecessary Ports: Disable unused ports (e.g., USB) to prevent unauthorized access.
- Regular Security Audits: Conduct regular security audits to identify and address potential vulnerabilities. This can involve penetration testing and vulnerability scanning.
Best Practices for Protecting Data Transmitted by IoT Devices
Data transmitted by IoT devices is a prime target for attackers. Implementing robust security measures to protect this data is essential for maintaining confidentiality, integrity, and availability.
- Use Encryption: Encrypt all data transmitted between the Raspberry Pi and the cloud, as well as between devices. Utilize protocols like TLS/SSL for secure communication channels.
- Implement Authentication and Authorization:
- Authenticate Devices: Ensure that only authorized devices can connect to the network and transmit data. Implement device-specific authentication mechanisms.
- Authorize Users: Implement robust user authentication and authorization to control access to data and device functionalities.
- Data Validation and Sanitization:
- Validate Input: Validate all data received by the Raspberry Pi to prevent injection attacks and ensure data integrity.
- Sanitize Output: Sanitize output data to prevent cross-site scripting (XSS) and other web application vulnerabilities.
- Data Minimization: Only collect and transmit the minimum amount of data necessary. Avoid storing sensitive data unnecessarily.
- Regular Security Audits and Penetration Testing: Regularly assess the security posture of the IoT system through security audits and penetration testing to identify and address vulnerabilities.
- Implement Intrusion Detection and Prevention Systems (IDS/IPS): Employ IDS/IPS to monitor network traffic for malicious activity and automatically block or alert on suspicious behavior.
- Secure Data Storage: If data is stored on the Raspberry Pi or in the cloud, use secure storage mechanisms, such as encryption and access controls.
- Data Backup and Recovery: Implement a data backup and recovery plan to ensure that data can be restored in case of a security breach or device failure. This is particularly critical for applications generating large volumes of data.
- Compliance with Data Privacy Regulations: Adhere to relevant data privacy regulations, such as GDPR or CCPA, to protect user data and maintain compliance. This includes obtaining consent, providing data access and deletion rights, and implementing appropriate security measures.
Project Examples and Case Studies
This section explores practical IoT projects using a Raspberry Pi, providing step-by-step guides, code examples, and potential enhancements. The goal is to illustrate how the concepts discussed previously translate into real-world applications, fostering a deeper understanding of IoT project development.
Smart Home Temperature Monitoring Project
This project demonstrates how to build a smart home temperature monitoring system using a Raspberry Pi, a temperature sensor, and a web interface for data visualization. This project exemplifies a fundamental IoT application, collecting and presenting environmental data in real-time.
Hardware Components
The hardware required for this project is relatively simple and readily available. It includes:
- Raspberry Pi (any model): The central processing unit for the project.
- DHT11 or DHT22 Temperature and Humidity Sensor: This sensor measures temperature and humidity. The DHT22 offers higher accuracy and a wider range compared to the DHT11.
- Breadboard: Used for connecting the sensor to the Raspberry Pi without soldering.
- Jumper Wires: For making electrical connections between the Raspberry Pi, the sensor, and the breadboard.
- 5V Power Supply (for the Raspberry Pi): Provides power to the Raspberry Pi.
- MicroSD Card: Stores the operating system and project files.
A DHT11 or DHT22 sensor is a common choice for this type of project because of its ease of use and affordability. The choice between the DHT11 and DHT22 often depends on the desired accuracy and the environmental conditions. The breadboard simplifies the wiring process, allowing for quick prototyping and modifications.
Hardware Setup
The physical connections between the components are straightforward. Follow these steps:
- Connect the DHT11/DHT22 sensor to the breadboard: Place the sensor on the breadboard so that its pins are accessible.
- Connect the sensor’s VCC pin to the 3.3V or 5V pin on the Raspberry Pi: Ensure the voltage matches the sensor’s specifications. The DHT11 typically operates at 3.3V, while the DHT22 can work with 3.3V or 5V.
- Connect the sensor’s GND pin to the GND pin on the Raspberry Pi.
- Connect the sensor’s DATA pin to a GPIO pin on the Raspberry Pi: For example, GPIO4. The specific GPIO pin can be chosen based on your preference and project requirements.
Carefully connecting the components according to these instructions is crucial for the system to function correctly. Incorrect wiring can damage the components or prevent the sensor from reading data.
Software Installation and Configuration
This section covers the software setup required to run the project. This involves installing necessary libraries and configuring the Raspberry Pi.
- Install the operating system: Flash the Raspberry Pi OS (e.g., Raspberry Pi OS Lite) onto the microSD card.
- Enable SSH: Enable Secure Shell (SSH) access to remotely connect to the Raspberry Pi from a computer. Create an empty file named “ssh” in the boot partition of the microSD card.
- Connect to the Raspberry Pi: Use an SSH client (like PuTTY or the terminal on Linux/macOS) to connect to the Raspberry Pi using its IP address and the default username “pi” and password “raspberry”.
- Update the system: Run the following commands in the terminal to update the system packages:
sudo apt update
sudo apt upgrade - Install the necessary libraries: Install the required Python libraries for interacting with the sensor and creating the web interface. Run the following command:
sudo apt install python3-pip
pip3 install Adafruit_DHT flask
Ensuring the correct installation of the necessary libraries is essential for the proper functioning of the project. The `Adafruit_DHT` library is used to read data from the DHT sensor, and `flask` is used to create a web server for data visualization.
Code Snippets
Here are the Python code snippets to read the sensor data and create a basic web server.
Sensor Reading (temp_sensor.py):
import Adafruit_DHT
import time

sensor = Adafruit_DHT.DHT11  # or Adafruit_DHT.DHT22 for DHT22
pin = 4 # GPIO pin connected to the sensor's data pin

def get_sensor_data():
    try:
        humidity, temperature = Adafruit_DHT.read_retry(sensor, pin)
        if humidity is not None and temperature is not None:
            return temperature, humidity
        else:
            return None, None
    except RuntimeError as error:
        print(f"Error reading sensor: error")
        return None, None

if __name__ == '__main__':
    while True:
        temperature, humidity = get_sensor_data()
        if temperature is not None:
            print(f"Temperature: temperature:.1f C, Humidity: humidity:.1f%")
        time.sleep(2) # Read sensor every 2 seconds
Web Server (app.py):
from flask import Flask, render_template
import temp_sensor
import time

app = Flask(__name__)

@app.route("/")
def index():
    temperature, humidity = temp_sensor.get_sensor_data()
    if temperature is not None:
        return render_template('index.html', temperature=temperature, humidity=humidity)
    else:
        return "Error reading sensor data"

if __name__ == '__main__':
    app.run(host='0.0.0.0', port=80)
HTML Template (templates/index.html):
    Temperature and Humidity


     Humidity:  humidity  %
The code is designed to be modular and easy to understand. The `temp_sensor.py` script handles reading the sensor data, while the `app.py` script uses Flask to create a simple web server that displays the data. The `index.html` file provides the HTML structure for the web page.
Running the Project
To run the project:
- Save the Python scripts: Save the code snippets above as `temp_sensor.py` and `app.py` in the same directory on your Raspberry Pi.
- Create the templates directory: Create a directory named “templates” in the same directory as the Python scripts.
- Save the HTML file: Save the HTML template as `index.html` inside the “templates” directory.
- Run the web server: Open a terminal, navigate to the directory containing the Python scripts, and run the following command:
python3 app.py
- Access the web interface: Open a web browser on a device connected to the same network as the Raspberry Pi and enter the Raspberry Pi’s IP address followed by `:80` (e.g., `http://192.168.1.100:80`). The temperature and humidity readings should be displayed.
Following these steps will set up the project and allow you to access the temperature and humidity data through a web interface. Ensure that the Raspberry Pi is connected to the internet for the web interface to be accessible.
Potential Extensions and Improvements
This section Artikels potential enhancements to the basic temperature monitoring project.
- Data Logging: Implement a system to log temperature and humidity data to a file or database (e.g., SQLite, MySQL). This allows for historical data analysis and the creation of graphs to visualize trends over time.
- Remote Access: Configure the web server to be accessible from outside the local network. This typically involves port forwarding on your router. Be mindful of security implications.
- Email/SMS Alerts: Set up notifications to be sent when the temperature or humidity exceeds predefined thresholds. This could involve using services like Twilio for SMS or email services.
- Cloud Integration: Integrate with a cloud platform (e.g., ThingSpeak, Adafruit IO, AWS IoT) to store and visualize data, offering advanced features like dashboards and data analytics.
- User Interface Enhancements: Improve the web interface with more advanced features, such as real-time graphs, historical data views, and settings for threshold alerts. Utilize frameworks like JavaScript libraries (e.g., Chart.js) for more interactive visualizations.
- Multiple Sensors: Extend the project to support multiple sensors, allowing for monitoring of different rooms or locations within a home or building.
- Calibration: Implement sensor calibration to improve accuracy. This involves comparing the sensor readings with a known, calibrated device and adjusting the readings accordingly.
- Security Measures: Implement security measures such as HTTPS for secure communication and user authentication to protect the data and the system.
These extensions significantly enhance the project’s functionality and provide valuable insights into the environment being monitored. Each improvement builds upon the basic foundation, transforming a simple project into a more sophisticated and useful IoT solution.
Troubleshooting and Debugging
Developing IoT projects with Raspberry Pi can be challenging, and encountering issues is inevitable. Effective troubleshooting and debugging are crucial for identifying and resolving problems, ensuring the smooth operation of your project. This section provides a comprehensive guide to help you navigate common challenges and build robust IoT solutions.
Common Issues in IoT Projects with Raspberry Pi
Several common issues can arise during the development and deployment of IoT projects using Raspberry Pi. Understanding these problems and their potential causes is the first step toward effective troubleshooting.
- Hardware Failures: Raspberry Pi boards, sensors, and other components can fail due to various reasons, including power surges, physical damage, or manufacturing defects. It’s important to test each component individually before integrating them into the project.
- Software Bugs: Errors in the code are a frequent source of problems. These bugs can manifest as incorrect sensor readings, communication failures, or unexpected program behavior. Thorough testing and debugging are essential to identify and fix these issues.
- Network Connectivity Problems: Reliable network connectivity is vital for IoT projects. Issues with Wi-Fi, Ethernet, or cellular connections can disrupt data transmission and cloud integration. Troubleshooting network problems is a critical skill.
- Sensor Malfunctions: Sensors can provide inaccurate or inconsistent data due to calibration issues, environmental factors, or hardware failures. Regular calibration and validation are necessary to ensure data accuracy.
- Power Supply Issues: Insufficient or unstable power can lead to unexpected behavior and hardware damage. Using a reliable power supply with the correct voltage and current rating is crucial.
- Data Storage Problems: Issues with data storage, such as SD card corruption or insufficient storage space, can cause data loss or project failure. Implementing proper data management and backup strategies is important.
- Security Vulnerabilities: IoT devices can be vulnerable to security threats, such as unauthorized access or data breaches. Implementing robust security measures is essential to protect the project.
Troubleshooting Network Connectivity Problems
Network connectivity is fundamental to most IoT projects, enabling communication between the Raspberry Pi and the cloud or other devices. When encountering network problems, a systematic approach is necessary to diagnose and resolve the issue.
- Verify Physical Connections:
Ensure that all physical connections, such as Ethernet cables or Wi-Fi antennas, are securely connected. Check the Ethernet cable for damage and ensure the Wi-Fi antenna is properly connected to the Raspberry Pi. - Check Network Configuration:
Verify the network configuration on the Raspberry Pi. Use the command-line interface (CLI) to check the IP address, subnet mask, gateway, and DNS server settings.ifconfigorip addr(for Ethernet)iwconfig(for Wi-Fi)Ensure the settings are correct and match your network configuration.
- Test Network Connectivity:
Use thepingcommand to test the connection to the gateway, DNS server, or a remote server (e.g., Google’s public DNS: 8.8.8.8).ping 8.8.8.8If the ping fails, there’s a problem with network connectivity.
- Troubleshoot Wi-Fi Issues:
If using Wi-Fi, verify the SSID and password are correct. Check the signal strength and ensure the Raspberry Pi is within range of the Wi-Fi router.
Consider using a Wi-Fi analyzer tool to identify channel congestion or interference. - Check Firewall Settings:
Ensure that the firewall on the Raspberry Pi or the network router isn’t blocking the necessary ports or protocols for communication. Check the firewall rules and adjust them if necessary. - Restart Network Services:
Restart the network services on the Raspberry Pi to refresh the network configuration. Use the commandsudo systemctl restart networking. - Examine Logs:
Check the system logs for any error messages related to network connectivity. Use the commandsudo journalctl -u networkingor check logs in/var/log/syslogor/var/log/messages. - Test with a Different Network:
If possible, test the Raspberry Pi on a different network (e.g., a mobile hotspot) to determine if the problem is specific to your primary network. This can help isolate the issue.
Methods for Debugging Code and Identifying Sensor-Related Issues
Debugging code and identifying sensor-related problems are essential for ensuring the reliability and accuracy of your IoT project. Employing effective debugging techniques can save time and effort.
- Print Statements:
Insert print statements throughout your code to display the values of variables, the flow of execution, and the status of operations. This is a simple but effective way to trace the program’s behavior. - Logging:
Use a logging library to record events, errors, and other relevant information to a file or console. This allows you to track the program’s execution over time and identify potential issues.In Python, the
loggingmodule is a good choice.Logging is especially useful for debugging projects that run continuously or remotely.
- Breakpoints and Debuggers:
Use a debugger to set breakpoints in your code and step through the execution line by line. This allows you to inspect the values of variables and identify the source of errors.Popular IDEs like VS Code, PyCharm, and Thonny offer debugging features.
This method is invaluable for complex code.
- Error Handling:
Implement error handling mechanisms (e.g., try-except blocks in Python) to catch exceptions and prevent the program from crashing. Log the errors and take appropriate actions, such as retrying the operation or sending an alert. - Sensor Data Validation:
Validate sensor data to ensure it falls within expected ranges. Check for outliers or inconsistencies.For example, if a temperature sensor reads -50°C, it’s likely an error.
This helps to identify sensor malfunctions or calibration issues.
- Calibration:
Calibrate your sensors to improve accuracy. This involves comparing sensor readings to known values and adjusting the sensor’s output accordingly. - Sensor Testing:
Test the sensors individually before integrating them into your project. Verify that they are functioning correctly and providing accurate readings. Use the manufacturer’s documentation to understand the sensor’s specifications and operating parameters. - Code Reviews:
Have other developers review your code to identify potential errors or areas for improvement. This can help catch bugs that you might have missed.
Tips for Using Debugging Tools
Effective use of debugging tools can significantly streamline the troubleshooting process. Here are some tips to maximize their effectiveness.
- Strategic Placement of Print Statements: Place print statements at key points in your code, such as before and after critical operations, to monitor variable values and the flow of execution.
- Detailed Logging Messages: When using logging, provide detailed messages that include timestamps, the source of the log message (e.g., function name), and relevant variable values.
- Use Debuggers Effectively: Learn how to use the debugger in your chosen IDE or editor. Set breakpoints strategically, step through the code line by line, and inspect variable values to understand the program’s behavior.
- Isolate the Problem: If you encounter an issue, try to isolate the problem by commenting out sections of code or disabling components to identify the source of the error.
- Version Control: Use version control (e.g., Git) to track changes to your code and revert to previous versions if necessary. This is helpful when you introduce a bug that you cannot immediately fix.
- Read Error Messages: Pay close attention to error messages and stack traces. They often provide valuable clues about the source of the problem.
- Consult Documentation and Online Resources: When encountering an issue, consult the documentation for the libraries, frameworks, and hardware you are using. Search online forums and communities for solutions to similar problems. Stack Overflow is a valuable resource.
- Test Frequently: Test your code frequently during development. This makes it easier to identify and fix bugs as they arise.
Conclusion
In conclusion, “How to Coding IoT Project with Raspberry Pi” provides a robust foundation for anyone eager to explore the exciting domain of IoT. By mastering the concepts and techniques presented, you’ll be well-equipped to design, build, and deploy your own innovative IoT solutions. Remember that security is paramount and that continuous learning and experimentation are key to success. Armed with the knowledge gained, you’re now ready to build connected devices and contribute to the ever-evolving world of the Internet of Things.