Embark on a journey into the world of Content Management Systems (CMS) with our guide on “how to coding CMS with Express.js”. This comprehensive exploration will equip you with the knowledge and skills to build your own custom CMS, leveraging the power and flexibility of Node.js and the Express.js framework. Forget the limitations of pre-built solutions; we’ll delve into the exciting possibilities of tailoring a CMS precisely to your needs.
We’ll start by exploring the benefits of Express.js for CMS development, followed by setting up your development environment, selecting and configuring a database, and designing your CMS structure. From implementing core features like CRUD operations and user authentication to building a user-friendly frontend and managing media, this guide covers every aspect of crafting a robust and scalable CMS. Get ready to unlock your potential to create dynamic and feature-rich web applications!
Introduction to CMS Development with Express.js
Developing a Content Management System (CMS) using Express.js offers a flexible and powerful approach to managing web content. Express.js, a minimal and flexible Node.js web application framework, provides the necessary tools and structure to build a custom CMS tailored to specific needs. This approach allows for greater control over functionality, design, and user experience compared to using pre-built solutions.
Benefits of Using Express.js for Building a CMS
Express.js offers several advantages when constructing a CMS. These benefits contribute to a more efficient, scalable, and maintainable system.
- Flexibility and Customization: Express.js provides a blank canvas, allowing developers to build a CMS precisely matching the requirements of their content and users. This contrasts with pre-built CMS platforms, which may impose limitations or require extensive customization to achieve specific functionalities.
- Performance: Node.js, on which Express.js is built, is known for its non-blocking, event-driven architecture. This leads to excellent performance, especially for applications handling concurrent requests, a common scenario in CMS environments.
- Scalability: Express.js applications can be easily scaled to accommodate growing content and user traffic. This scalability is crucial as a CMS evolves and the volume of content increases.
- Community and Ecosystem: Express.js benefits from a large and active community, offering a wealth of resources, tutorials, and third-party modules. This ecosystem simplifies development and provides solutions to common challenges.
- Control: Developers have complete control over the CMS’s code, database interactions, and user interface. This control is essential for security, data privacy, and long-term maintenance.
Overview of Express.js and Its Core Functionalities
Express.js is a lightweight framework that sits on top of Node.js, simplifying the creation of web applications and APIs. Its core functionalities enable developers to handle requests, manage routes, and render content.
- Routing: Express.js simplifies routing, mapping URLs to specific functions or handlers. This is fundamental for organizing content and user navigation within the CMS. For example:
      app.get('/articles/:slug', (req, res) =>

          const slug = req.params.slug;

          // Fetch article based on slug

          res.render('article',  article: articleData );

      );
- Middleware: Middleware functions are essential for processing requests and responses. Express.js provides a robust middleware system for tasks such as authentication, logging, and parsing request bodies.
- Templating Engines: Express.js integrates seamlessly with various templating engines (e.g., Pug, EJS, Handlebars). These engines enable dynamic content generation, making it easy to create reusable templates for different content types.
- Request and Response Objects: Express.js provides `req` and `res` objects to handle incoming requests and send responses. The `req` object contains information about the request (headers, parameters, body), and the `res` object provides methods for sending responses (status codes, content).
- Error Handling: Express.js includes built-in error handling mechanisms. Developers can define error-handling middleware to catch and manage errors gracefully, improving the CMS’s robustness.
Advantages of a Custom CMS Over Pre-built Solutions
Choosing a custom CMS built with Express.js over pre-built solutions offers distinct advantages, particularly for projects with unique requirements or complex content structures.
- Tailored Functionality: A custom CMS allows for the implementation of features specifically designed for the content and user needs. This leads to a more efficient and user-friendly experience.
- Security: Custom CMS platforms can be built with enhanced security measures, addressing specific vulnerabilities that might exist in widely used pre-built solutions. Developers can control and monitor all aspects of the security implementation.
- Performance Optimization: Developers can optimize the CMS’s performance by carefully selecting libraries, database interactions, and code execution paths. This results in faster loading times and improved user experience.
- Scalability and Flexibility: Custom CMS platforms are designed with scalability in mind, accommodating content growth and user traffic increases. This adaptability ensures the CMS can evolve with the business’s changing needs.
- Integration Capabilities: Custom CMS platforms can be seamlessly integrated with other systems and services, such as e-commerce platforms, CRM systems, and third-party APIs. This facilitates a connected and efficient workflow.
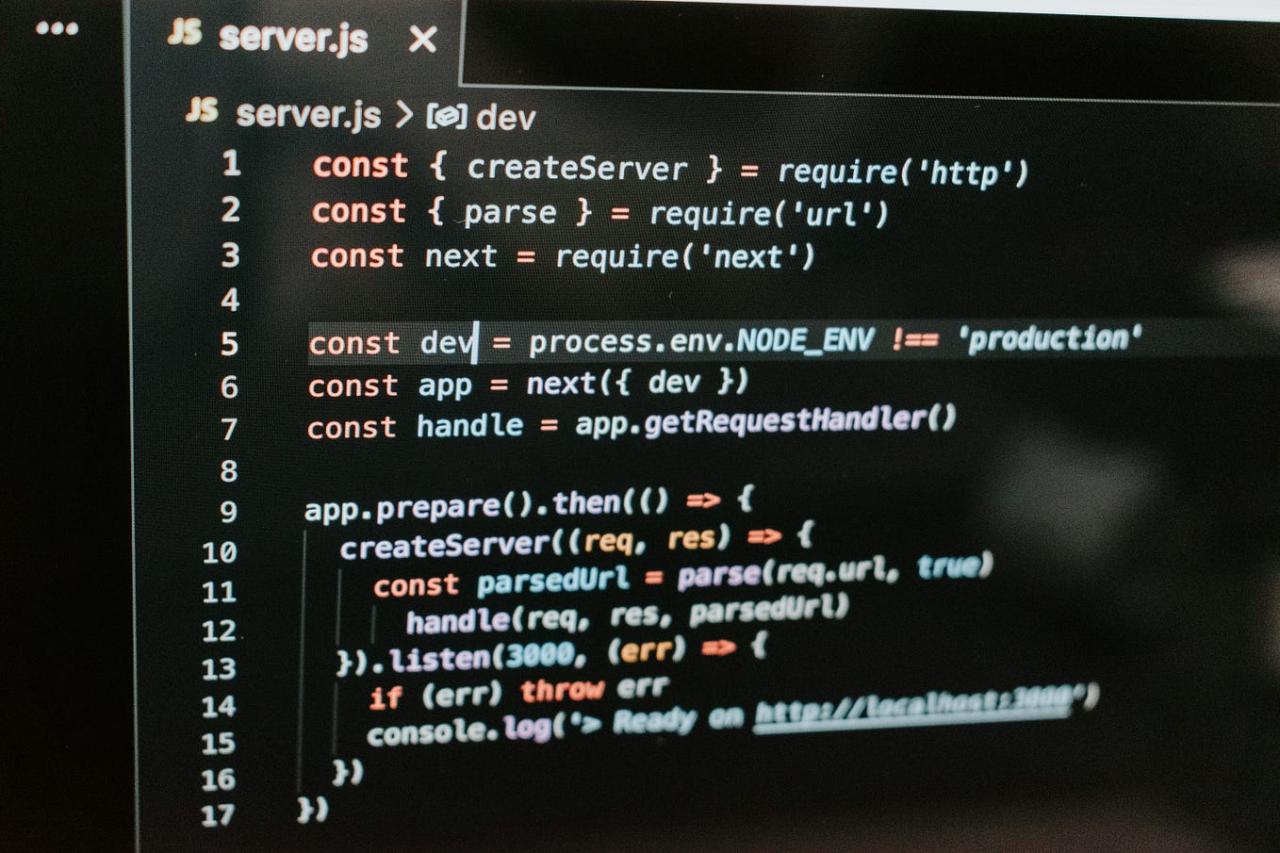
Setting Up the Development Environment
To build a Content Management System (CMS) with Express.js, a robust development environment is essential. This section details the necessary tools and the steps to configure them, laying the groundwork for a successful project.
Required Tools and Software
The development process relies on several key tools. These tools facilitate coding, dependency management, and project execution.
- Node.js and npm: Node.js is a JavaScript runtime environment that allows you to execute JavaScript code server-side. npm (Node Package Manager) is the default package manager for Node.js. It is used to install and manage the project’s dependencies.
- Code Editor: A code editor or Integrated Development Environment (IDE) is needed for writing and editing the code. Popular choices include Visual Studio Code, Sublime Text, Atom, and WebStorm. These editors provide features such as syntax highlighting, code completion, and debugging tools, which greatly enhance the development workflow.
Initializing a New Express.js Project
Creating a new Express.js project involves several straightforward steps. These steps set up the project’s basic structure.
- Create a Project Directory: Open your terminal or command prompt and create a new directory for your project. For example, use the command:
mkdir cms-express
- Navigate to the Project Directory: Change your current directory to the newly created project directory using the command:
cd cms-express
- Initialize npm: Initialize a new npm project. This creates a
package.jsonfile, which will store the project’s metadata and dependencies. Use the command:
npm init -y
The
-yflag accepts all the default settings. You can customize these settings by omitting the-yflag and answering the prompts. - Install Express.js: Install Express.js as a project dependency. This adds Express.js to your project and lists it in the
package.jsonfile. Use the command:
npm install express –save
The
--saveflag ensures that Express.js is added to the project’s dependencies. - Create the Entry Point File: Create a file (e.g.,
index.jsorapp.js) in your project directory. This file will contain the main application code.
Installing and Configuring Dependencies
The project requires additional dependencies beyond Express.js. These dependencies provide various functionalities, such as handling HTTP requests and templating.
- Installing Dependencies: Install the necessary dependencies using npm. For example, to install the
body-parsermiddleware for parsing request bodies and theejstemplating engine:
npm install body-parser ejs –save
The
--saveflag ensures these dependencies are added to thepackage.jsonfile. - Configuring Dependencies: After installing dependencies, you need to configure them within your Express.js application. This usually involves importing the modules and using them as middleware. For example, to use
body-parser:const express = require('express');const bodyParser = require('body-parser');const app = express();app.use(bodyParser.urlencoded( extended: true ));app.use(bodyParser.json());This configuration allows your application to parse URL-encoded and JSON request bodies.
- Setting Up Templating Engine: Configure the templating engine to render dynamic content. For example, to use
ejs:app.set('view engine', 'ejs');app.set('views', './views');This code sets the view engine to EJS and specifies the directory where the view files are located. The views directory typically contains HTML files with embedded JavaScript code to render dynamic content.
Database Selection and Setup

Choosing the right database is a crucial step in developing a Content Management System (CMS) with Express.js. The database serves as the central repository for all content, user data, and system configurations. The selection process involves considering various factors, including data structure, scalability needs, performance requirements, and the development team’s familiarity with different database technologies. This section delves into several database options suitable for a CMS, providing a comparative analysis and guiding you through the connection setup with your Express.js application.
Identifying Database Options
A CMS can utilize a variety of database systems. The choice depends on the specific needs of the project. Several popular and suitable options exist, each with its strengths and weaknesses.
- MongoDB: A NoSQL document database, ideal for flexible data structures and rapid development. It’s particularly well-suited for CMS applications where content models may evolve over time.
- PostgreSQL: A powerful, open-source relational database known for its robustness, data integrity, and support for complex queries. PostgreSQL is a strong choice for CMS projects that require strict data consistency and ACID compliance.
- MySQL: Another widely used relational database, offering a balance of performance, ease of use, and cost-effectiveness. MySQL is a popular option for CMS projects, especially those with a large user base or high traffic.
Comparative Analysis of Database Options
Understanding the pros and cons of each database option is essential for making an informed decision. The following table provides a comparative analysis of MongoDB, PostgreSQL, and MySQL, highlighting key considerations for a CMS project.
| Feature | MongoDB | PostgreSQL | MySQL |
|---|---|---|---|
| Data Model | Document-oriented (NoSQL) | Relational (SQL) | Relational (SQL) |
| Data Structure Flexibility | High (schema-less) | Moderate (schema-based) | Moderate (schema-based) |
| Scalability | Horizontal scaling (sharding) | Vertical and horizontal scaling | Vertical and horizontal scaling |
| Data Integrity | ACID transactions available, but not default | Strong ACID compliance | ACID compliance |
| Query Language | MongoDB Query Language | SQL | SQL |
| Ease of Use | Generally easier to learn and use for document-based data | Requires understanding of relational database concepts | Relatively easy to learn and use |
| Performance | Fast read/write operations for unstructured data | Excellent performance, especially with complex queries and data relationships | Good performance; optimized for web applications |
| Use Cases in CMS | Content with evolving structures, rapid prototyping, blog platforms | CMS requiring strict data integrity, complex data relationships, and advanced features | Widely used in CMS, especially with large user bases and high traffic |
| Community & Support | Large and active community, extensive documentation | Large and active community, excellent documentation | Very large community, extensive documentation, and widespread support |
| Cost | Open-source, with cloud services available | Open-source | Open-source, with commercial versions available |
Connecting Express.js to a Database
Connecting your Express.js application to a database involves installing the appropriate Node.js driver for the chosen database and configuring the connection within your application. The specific steps vary depending on the database system. Below are examples of how to connect to MongoDB, PostgreSQL, and MySQL.
Connecting to MongoDB
To connect to MongoDB, you’ll typically use the `mongoose` library, an Object-Document Mapper (ODM) for MongoDB and Node.js. First, install `mongoose` using npm:“`bashnpm install mongoose“`Then, in your Express.js application (e.g., `app.js` or a dedicated `database.js` file), import `mongoose` and establish the connection:“`javascriptconst mongoose = require(‘mongoose’);async function connectDB() try await mongoose.connect(‘mongodb://localhost:27017/your_database_name’, // Replace with your MongoDB connection string useNewUrlParser: true, useUnifiedTopology: true, ); console.log(‘Connected to MongoDB’); catch (error) console.error(‘MongoDB connection error:’, error); connectDB();“`In this example:* `mongoose.connect()` establishes the connection to the MongoDB server.
Replace `mongodb://localhost:27017/your_database_name` with your actual connection string, which includes the database host, port, and database name.
`useNewUrlParser
true` and `useUnifiedTopology: true` are options to address deprecation warnings and improve connection handling.After establishing the connection, you can define schemas and models to interact with your MongoDB database.
Connecting to PostgreSQL
For PostgreSQL, you can use the `pg` or `pg-promise` libraries. `pg` is a simpler driver, while `pg-promise` offers more advanced features. First, install the library:“`bashnpm install pg“`Here’s an example using `pg`:“`javascriptconst Client = require(‘pg’);async function connectDB() const client = new Client( host: ‘localhost’, port: 5432, // Default PostgreSQL port user: ‘your_user’, // Replace with your PostgreSQL username password: ‘your_password’, // Replace with your PostgreSQL password database: ‘your_database_name’, // Replace with your database name ); try await client.connect(); console.log(‘Connected to PostgreSQL’); // Example query const result = await client.query(‘SELECT NOW()’); console.log(result.rows); catch (err) console.error(‘PostgreSQL connection error:’, err); finally await client.end(); connectDB();“`In this example:* The `Client` object from the `pg` module is used to create a database client.
- Connection details (host, port, user, password, database) are provided to the `Client` constructor.
- `client.connect()` establishes the connection to the PostgreSQL server.
- `client.query()` is used to execute SQL queries.
- `client.end()` closes the connection.
Connecting to MySQL
For MySQL, you can use the `mysql2` library, a modern, fast, and easy-to-use MySQL driver for Node.js. Install it using npm:“`bashnpm install mysql2“`Here’s an example of connecting to MySQL using `mysql2`:“`javascriptconst mysql = require(‘mysql2/promise’);async function connectDB() try const connection = await mysql.createConnection( host: ‘localhost’, user: ‘your_user’, // Replace with your MySQL username password: ‘your_password’, // Replace with your MySQL password database: ‘your_database_name’, // Replace with your database name ); console.log(‘Connected to MySQL’); // Example query const [rows, fields] = await connection.execute(‘SELECT 1 + 1 AS solution’); console.log(rows); await connection.end(); catch (err) console.error(‘MySQL connection error:’, err); connectDB();“`In this example:* `mysql2/promise` is used to create a connection to the MySQL database.
- Connection details (host, user, password, database) are provided to `mysql.createConnection()`.
- `connection.execute()` is used to execute SQL queries.
- `connection.end()` closes the connection.
After successfully connecting to the database, you can start defining models and performing database operations within your Express.js application to store and retrieve data for your CMS.
Implementing the CMS Core Features: CRUD Operations
Implementing Create, Read, Update, and Delete (CRUD) operations is fundamental to any Content Management System (CMS). These operations allow users to manage content effectively. This section will detail the implementation of CRUD operations within an Express.js CMS, focusing on a modular approach for maintainability and scalability.
Creating CRUD Routes
The creation of routes is the first step in enabling CRUD functionality. Routes define the endpoints that handle requests for creating, reading, updating, and deleting content. We’ll establish these routes using Express.js’s routing capabilities.
- Defining Routes: Routes are defined using Express.js’s router object. For example, `router.post(‘/articles’, createArticle);` defines a route for creating an article. The first argument is the path, and the second is the function that handles the request (the controller function).
- HTTP Methods: Each CRUD operation corresponds to a specific HTTP method:
- Create: POST (e.g., `/articles`)
- Read: GET (e.g., `/articles`, `/articles/:id`)
- Update: PUT or PATCH (e.g., `/articles/:id`)
- Delete: DELETE (e.g., `/articles/:id`)
- Route Parameters: Routes often include parameters, such as `:id`, to identify specific content items. For instance, `/articles/:id` allows accessing an article by its ID.
Implementing CRUD Operations for ‘Articles’
The following demonstrates the implementation of CRUD operations for a specific content type, ‘articles’. This example assumes a basic database setup (e.g., using a database like MongoDB).
- Create (POST /articles): This operation handles the creation of a new article. It receives data from the request body, validates the data, saves it to the database, and returns a success response.
        // Example: Article creation controller function
        const createArticle = async (req, res) =>
            try
                const  title, content, author  = req.body;
                const newArticle = await Article.create( title, content, author );
                res.status(201).json(newArticle); // 201 Created
             catch (error)
                res.status(400).json( message: error.message ); // 400 Bad Request

        ;
        // Example: Get all articles
        const getAllArticles = async (req, res) =>
            try
                const articles = await Article.find();
                res.json(articles);
             catch (error)
                res.status(500).json( message: error.message ); // 500 Internal Server Error

        ;

        // Example: Get a specific article by ID
        const getArticleById = async (req, res) =>
            try
                const  id  = req.params;
                const article = await Article.findById(id);
                if (!article)
                    return res.status(404).json( message: 'Article not found' ); // 404 Not Found

                res.json(article);
             catch (error)
                res.status(500).json( message: error.message ); // 500 Internal Server Error

        ;
        // Example: Update an article
        const updateArticle = async (req, res) =>
            try
                const  id  = req.params;
                const  title, content, author  = req.body;
                const updatedArticle = await Article.findByIdAndUpdate(id,  title, content, author ,  new: true );
                if (!updatedArticle)
                    return res.status(404).json( message: 'Article not found' ); // 404 Not Found

                res.json(updatedArticle);
             catch (error)
                res.status(400).json( message: error.message ); // 400 Bad Request

        ;
        // Example: Delete an article
        const deleteArticle = async (req, res) =>
            try
                const  id  = req.params;
                const deletedArticle = await Article.findByIdAndDelete(id);
                if (!deletedArticle)
                    return res.status(404).json( message: 'Article not found' ); // 404 Not Found

                res.json( message: 'Article deleted' );
             catch (error)
                res.status(500).json( message: error.message ); // 500 Internal Server Error

        ;
Organizing Code Using a Modular Approach
A modular approach enhances code maintainability and scalability. The following Artikels a suggested structure for organizing CRUD operations.
- Models: Models define the structure of the data (e.g., the Article model). They interact directly with the database. They can include validation rules.
        // Example: Article model (using Mongoose)
        const mongoose = require('mongoose');
        const articleSchema = new mongoose.Schema(
            title:  type: String, required: true ,
            content:  type: String, required: true ,
            author:  type: String ,
        );
        module.exports = mongoose.model('Article', articleSchema);
        // Example: Controller functions (as shown in the previous section)
        const createArticle = async (req, res) =>  ... ;
        const getAllArticles = async (req, res) =>  ... ;
        // ... other CRUD controller functions
        // Example: Article routes
        const express = require('express');
        const router = express.Router();
        const articleController = require('../controllers/articleController');

        router.post('/articles', articleController.createArticle);
        router.get('/articles', articleController.getAllArticles);
        router.get('/articles/:id', articleController.getArticleById);
        router.put('/articles/:id', articleController.updateArticle);
        router.delete('/articles/:id', articleController.deleteArticle);

        module.exports = router;
User Authentication and Authorization

Implementing user authentication and authorization is crucial for any Content Management System (CMS) to ensure data security, content integrity, and controlled access to functionalities. This safeguards sensitive information, prevents unauthorized modifications, and allows for role-based access, tailoring the CMS experience to each user’s responsibilities. By integrating these features, you create a robust and secure platform.
Importance of User Authentication and Authorization in a CMS
User authentication and authorization are fundamental pillars in securing a CMS and maintaining its operational integrity. Authentication verifies the identity of a user attempting to access the system, while authorization determines what resources and functionalities that user is permitted to access.
- Data Security: Authentication protects sensitive data from unauthorized access. Without it, anyone could potentially view, modify, or delete content. Authorization ensures that even authenticated users can only access the data and functions relevant to their roles.
- Content Integrity: Authorization prevents unauthorized content changes, ensuring the accuracy and reliability of the information displayed. This prevents malicious actors from introducing misinformation or defacing the website.
- Controlled Access: Role-based access control (RBAC) allows administrators to define specific roles and permissions for users. This means that different users, such as editors, authors, and administrators, have access only to the features and content they need to perform their jobs.
- Compliance: Many industries and regulatory bodies require strict access controls to protect data privacy and security. Implementing authentication and authorization helps meet these requirements.
- User Experience: A well-implemented authorization system simplifies the user experience. Users only see the tools and content relevant to their roles, reducing clutter and improving efficiency.
Implementing User Registration and Login Functionality
User registration and login are the foundational elements of any authentication system. The following steps Artikel the process of implementing these features using Express.js, along with common considerations for security and usability.
- Setting up the User Model: Define a user model in your database. This model typically includes fields like `username`, `email`, `password` (hashed), and `role`. Consider using a library like Mongoose for MongoDB or Sequelize for SQL databases to simplify this process.
- Creating Registration Routes: Implement routes for user registration.
- These routes should handle POST requests to endpoints like `/register`.
- The registration process typically involves validating user input (e.g., checking for valid email format, ensuring password strength, and verifying that the username is unique).
- The password should be securely hashed using a library like `bcrypt` before storing it in the database.
- Implementing Login Routes: Create routes for user login.
- These routes should handle POST requests to endpoints like `/login`.
- The login process involves retrieving the user’s information from the database, verifying the provided password against the hashed password stored in the database, and creating a session if the credentials are valid.
- Use a library like `express-session` to manage user sessions. This stores a session identifier (e.g., a cookie) on the user’s browser, which is used to identify the user on subsequent requests.
- Session Management: Configure session middleware. This allows you to store user-specific data (like the user’s ID and role) in the session. This data can then be accessed in subsequent requests to determine if the user is logged in and what permissions they have.
- Implementing Logout Functionality: Implement a route for user logout. This route should clear the user’s session, effectively logging them out of the system.
- Error Handling and User Feedback: Implement robust error handling and provide clear feedback to the user. This includes handling invalid credentials, validation errors during registration, and other potential issues.
Example of a simple registration route (using `bcrypt` for password hashing):
“`javascript
const express = require(‘express’);
const bcrypt = require(‘bcrypt’);
const User = require(‘./models/user’); // Assuming you have a User model
const router = express.Router();
router.post(‘/register’, async (req, res) =>
try
const username, email, password = req.body;
// Input validation (omitted for brevity)
const hashedPassword = await bcrypt.hash(password, 10); // 10 is the salt rounds
const newUser = new User(
username,
email,
password: hashedPassword,
);
await newUser.save();
res.status(201).json( message: ‘User registered successfully’ );
catch (error)
console.error(error);
res.status(500).json( message: ‘Registration failed’ );
);
“`
Example of a simple login route (using `bcrypt` for password comparison):
“`javascript
const express = require(‘express’);
const bcrypt = require(‘bcrypt’);
const User = require(‘./models/user’); // Assuming you have a User model
const router = express.Router();
router.post(‘/login’, async (req, res) =>
try
const username, password = req.body;
const user = await User.findOne( username );
if (!user)
return res.status(401).json( message: ‘Invalid credentials’ );
const isPasswordValid = await bcrypt.compare(password, user.password);
if (!isPasswordValid)
return res.status(401).json( message: ‘Invalid credentials’ );
// Create a session
req.session.userId = user._id;
req.session.role = user.role; // Assuming you have a ‘role’ field in your User model
res.status(200).json( message: ‘Login successful’ );
catch (error)
console.error(error);
res.status(500).json( message: ‘Login failed’ );
);
“`
Implementing Role-Based Access Control (RBAC) to Restrict Content Access
Role-Based Access Control (RBAC) is a powerful method for managing user permissions within a CMS. It enables administrators to define roles (e.g., ‘admin’, ‘editor’, ‘author’) and assign specific permissions to each role. This ensures that users only have access to the features and content they need to perform their duties.
- Defining Roles and Permissions: Identify the different roles needed in your CMS (e.g., administrator, editor, author, viewer). Determine the specific permissions associated with each role.
- Example: An administrator might have permission to create, edit, and delete all content, manage users, and configure the system. An editor might have permission to edit existing content and publish it, while an author might only be able to create and edit their own content.
- Storing User Roles: Store the user’s role in the database, typically as a field in the user model.
- This field will be used to determine the user’s permissions.
- Implementing Middleware for Authorization: Create middleware functions to check if a user has the necessary permissions to access a specific route or perform a specific action.
- This middleware typically checks the user’s role (retrieved from the session) against the required permissions.
- Protecting Routes: Apply the authorization middleware to routes that require specific permissions.
- For example, a route to create new content might only be accessible to users with the ‘editor’ or ‘admin’ role.
- Authorization Logic in Templates/Views: Implement authorization logic in your templates or views to conditionally display content or UI elements based on the user’s role.
- This ensures that users only see the options and content they are authorized to access.
Example of authorization middleware:
“`javascript
function authorize(roles)
return (req, res, next) =>
if (!req.session.userId)
return res.status(401).json( message: ‘Unauthorized’ ); // Not logged in
if (!roles.includes(req.session.role))
return res.status(403).json( message: ‘Forbidden’ ); // Insufficient permissions
next(); // User is authorized
;
“`
Example of using the authorization middleware:
“`javascript
const express = require(‘express’);
const router = express.Router();
const authorize = require(‘./middleware/auth’); // Assuming you have an auth middleware
// Route accessible only to admins
router.post(‘/admin/create-content’, authorize([‘admin’]), (req, res) =>
// Logic to create content
res.status(201).json( message: ‘Content created successfully’ );
);
“`
The example above illustrates a common use case where a specific route, such as creating content, is protected using the `authorize` middleware. The middleware checks if the user’s role, stored in the session, is included in the list of allowed roles. If the user is not logged in or does not have the necessary role, they are denied access, reinforcing the importance of authorization in securing sensitive functionalities.
This approach allows for fine-grained control over user access, aligning with the principle of least privilege.
Building the CMS Frontend
The frontend of a Content Management System (CMS) is crucial for displaying and interacting with the content stored in the database. A templating engine simplifies the process of generating dynamic HTML, allowing developers to separate the presentation logic from the application logic. This separation makes the code cleaner, more maintainable, and easier to update.
Templating Engine Usage for HTML Generation
Templating engines are essential for creating dynamic web pages. They allow developers to embed data from the backend (e.g., the CMS database) directly into the HTML structure. This approach contrasts with manually constructing HTML strings in the backend, which is cumbersome and error-prone. Using a templating engine enables a clear separation of concerns, promoting better code organization. Common templating engines include Pug (formerly Jade), Handlebars, and EJS (Embedded JavaScript).
Each offers its syntax and features, but they all share the core function of taking data and transforming it into HTML.
Integrating a Templating Engine with Express.js
Integrating a templating engine with Express.js involves several steps. This example will focus on EJS, a popular choice for its simplicity and familiarity with JavaScript syntax.
- Installation: Begin by installing the templating engine using npm:
npm install ejs
- Configuration in Express.js: Configure Express.js to use EJS as the view engine. This is typically done in the main application file (e.g., `app.js` or `server.js`).
    const express = require('express');
    const app = express();
    app.set('view engine', 'ejs'); // Set EJS as the view engine
    app.set('views', './views'); // Specify the directory where your EJS files will reside (optional, defaults to 'views')
- Creating View Files: Create EJS files within the `views` directory (or the directory specified in `app.set(‘views’)`). These files will contain the HTML structure, along with placeholders for dynamic content.
- Rendering Views: In your route handlers, use the `res.render()` method to render the view and pass data to it.
    app.get('/posts', (req, res) =>
      const posts = [
         title: 'First Post', content: 'This is the first post.' ,
         title: 'Second Post', content: 'This is the second post.'
      ];
      res.render('posts',  posts: posts ); // Render the 'posts.ejs' view and pass the 'posts' data
    );
In the example above, the route `/posts` fetches an array of posts and passes it to the `posts.ejs` view.
Displaying Content from the Database on the Frontend
Displaying content retrieved from the database on the frontend involves fetching data from the database in the route handler and passing it to the templating engine for rendering.
Consider a scenario where a CMS stores blog posts in a database. Here’s how to display those posts using EJS:
- Fetch Data from the Database: In your route handler, query the database to retrieve the blog posts. This example assumes you have a database model named `Post`.
    const Post = require('./models/post'); // Assuming a model is defined in ./models/post.js
    app.get('/blog', async (req, res) =>
      try
        const posts = await Post.find(); // Fetch all posts from the database
        res.render('blog',  posts: posts ); // Render the 'blog.ejs' view and pass the 'posts' data
       catch (error)
        console.error('Error fetching posts:', error);
        res.status(500).send('Error loading posts');

    );
- Create the EJS View: Create a `blog.ejs` file in the `views` directory. Use EJS syntax to iterate over the `posts` array and display each post’s title and content.
    <!DOCTYPE html>
    <html>
    <head>
      <title>Blog</title>
    </head>
    <body>
      <h1>Blog Posts</h1>
      <% posts.forEach(post =>  %>
        <div>
          <h2><%= post.title %></h2>
          <p><%= post.content %></p>
        </div>
      <% ); %>
    </body>
    </html>
In this example, the EJS template iterates through the `posts` array passed from the route handler. For each post, it displays the title and content using the `<%= … %>` syntax to embed JavaScript expressions directly into the HTML.
Media Management and Uploads
Managing media, such as images and videos, is a crucial aspect of any CMS. It allows users to enrich content with visual elements, enhancing user engagement and overall content appeal. This section will delve into the process of handling file uploads within an Express.js application, covering storage, retrieval, and optimization techniques.
Handling File Uploads in Express.js
File uploads in Express.js typically involve middleware that handles the incoming file data. This middleware parses the request, extracts the file information, and allows the application to store the file in a designated location. Several npm packages simplify this process.
- Choosing a Middleware: Popular options include `multer` and `express-fileupload`. These packages provide functionalities for parsing `multipart/form-data` requests, which are commonly used for file uploads. `multer` is widely used and offers good control over file handling. `express-fileupload` simplifies file access within the request object.
- Installation: Install the chosen middleware using npm: `npm install multer` or `npm install express-fileupload`.
- Middleware Configuration: Configure the middleware within your Express.js application. This involves setting up the storage destination, specifying file size limits, and defining file filtering rules.
- Route Handling: Create routes that handle file upload requests. Within these routes, the middleware processes the incoming file data, and the application can then save the file to the storage location.
Implementing Media Upload Functionality
Implementing media upload functionality involves a series of steps, from setting up the middleware to storing and retrieving files. The following steps provide a comprehensive guide:
- Install and Configure Middleware:
- Install `multer`: `npm install multer`
- Require `multer` in your Express.js application: `const multer = require(‘multer’);`
- Configure storage using `multer.diskStorage()`: This defines where uploaded files will be stored. You can customize the destination directory and the filename.
Example:
const storage = multer.diskStorage( destination: (req, file, cb) => cb(null, 'uploads/'); // Specify the upload directory , filename: (req, file, cb) => cb(null, Date.now() + '-' + file.originalname); // Define the filename ); - Initialize `multer`: `const upload = multer( storage: storage );`
- Create an Upload Route:
- Define a route to handle file uploads.
- Use the middleware within the route to process the upload.
Example:
      app.post('/upload', upload.single('image'), (req, res) =>
        // 'image' is the name attribute of the file input in your form
        if (req.file)
          res.json( message: 'File uploaded successfully', filename: req.file.filename );
         else
          res.status(400).json( message: 'File upload failed' );

      );
- Implement File Retrieval:
- Create routes to serve uploaded files.
- Use the `express.static()` middleware to serve static files, including uploaded media.
Example:
app.use('/uploads', express.static('uploads')); // Serve files from the 'uploads' directory - In your frontend, construct the image source URLs based on the filename returned after upload.
Image Optimization for Web Use
Optimizing images is essential for web performance. Large image files can significantly slow down page load times, impacting user experience and . This section details methods for optimizing images for web use, focusing on size and format considerations.
- Image Formats:
- JPEG: Suitable for photographs and images with many colors. It offers good compression, but it can introduce some loss of quality.
- PNG: Best for images with sharp lines, text, and transparency. It provides lossless compression, preserving image quality.
- WebP: A modern image format that offers superior compression and quality compared to JPEG and PNG. It’s supported by most modern browsers. Using WebP can reduce image file sizes significantly, leading to faster page load times.
- Image Compression:
- Lossy Compression: Reduces file size by discarding some image data. JPEG uses lossy compression.
- Lossless Compression: Reduces file size without discarding image data. PNG uses lossless compression.
- Tools: Use image optimization tools such as:
- ImageOptim (macOS): A free tool for optimizing images.
- TinyPNG: A web-based tool for compressing PNG and JPEG images.
- Squoosh (web-based): Developed by Google, offers a variety of compression options and format conversions.
- Image Resizing:
- Responsiveness: Serve different image sizes based on the user’s device and screen size.
- Tools: Libraries such as `sharp` (Node.js) and online tools can resize images.
- Lazy Loading:
- Load images only when they are visible in the viewport. This technique improves initial page load time.
- Use the `loading=”lazy”` attribute on `
` tags.
Search Functionality
Implementing robust search functionality is crucial for a Content Management System (CMS). It significantly enhances the user experience by enabling efficient content discovery. Without effective search, users may struggle to find the information they need, leading to frustration and reduced engagement. A well-designed search feature allows users to quickly locate relevant content, navigate the CMS, and manage their data effectively.
Importance of Search Functionality in a CMS
The significance of search functionality in a CMS cannot be overstated. It acts as a central hub for information retrieval, playing a vital role in content accessibility and overall usability.
- Improved Content Discovery: Search enables users to quickly find specific content, regardless of its location within the CMS. This is especially critical as the amount of content grows.
- Enhanced User Experience: A well-implemented search feature provides a positive user experience by saving time and reducing frustration. Users can effortlessly find what they need, leading to increased satisfaction.
- Increased Productivity: Efficient search streamlines content management tasks. Editors and administrators can rapidly locate, review, and update content, improving overall productivity.
- Better Content Organization: Search capabilities help users understand and navigate the CMS’s structure. It enables them to categorize and tag content effectively, improving content organization.
- Data Analysis and Insights: Search logs can provide valuable insights into user behavior and content popularity. This data can be used to optimize content and improve the CMS’s functionality.
Implementing Basic Search Functionality
Implementing basic search functionality involves several steps, starting with the selection of a suitable database and the implementation of a search query. The method will depend on the database being used, but the underlying principles remain the same.
The following steps Artikel the basic implementation process:
- Database Integration: Ensure your Express.js application is correctly connected to your chosen database (e.g., MongoDB, PostgreSQL, MySQL).
- Content Indexing: Identify the fields in your content models that need to be searchable. This might include titles, descriptions, and content bodies.
- User Input Handling: Create a route and controller function to handle search queries. This function should receive the search term from the user (e.g., via a query parameter in the URL).
- Database Query Construction: Construct a database query that searches the indexed fields for the search term. The exact syntax will vary depending on the database. For example, using MongoDB with Mongoose, you might use the
$regexoperator for a case-insensitive search:
Example:
const searchTerm = req.query.term;
const regex = new RegExp(searchTerm, 'i'); // 'i' for case-insensitive
const results = await ContentModel.find(
  $or: [
     title:  $regex: regex  ,
     description:  $regex: regex  ,
     content:  $regex: regex
  ]
);
- Result Display: Display the search results to the user in a clear and organized manner. This might involve pagination, highlighting search terms, and displaying relevant content snippets.
- Error Handling: Implement error handling to gracefully manage cases where the search query fails or returns no results.
- Testing and Optimization: Thoroughly test the search functionality to ensure it returns accurate results and performs efficiently. Optimize queries as needed for better performance, especially as the amount of data grows.
Using a Search Index (e.g., Elasticsearch) for Advanced Search Capabilities
For more complex search requirements, such as handling large datasets, providing advanced filtering options, and supporting more sophisticated search queries, a dedicated search index is often the best solution. Elasticsearch is a popular choice for this purpose.
Here’s a basic Artikel of how to integrate Elasticsearch into your CMS:
- Install Elasticsearch: Install and configure an Elasticsearch cluster. This can be done locally or in a cloud environment (e.g., Elastic Cloud).
- Install Elasticsearch Client: Install an Elasticsearch client library for Node.js (e.g.,
@elastic/elasticsearch). - Create an Index: Define an index in Elasticsearch to store your content. This index will contain mappings that define the data types of your fields (e.g., text, , date).
- Index Content: Implement a process to index your content into Elasticsearch whenever content is created, updated, or deleted in your CMS.
Example of indexing a document:
const  Client  = require('@elastic/elasticsearch');
const client = new Client( node: 'http://localhost:9200' ); // Replace with your Elasticsearch endpoint

async function indexContent(content)
  try
    await client.index(
      index: 'cms_content', // Replace with your index name
      document:
        title: content.title,
        description: content.description,
        content: content.content,
        // other fields...

    );
    console.log('Content indexed successfully');
   catch (error)
    console.error('Error indexing content:', error);
- Implement Search Queries: Create API endpoints in your Express.js application to handle search queries to Elasticsearch.
Example of a search query:
async function searchContent(searchTerm)
  const  body  = await client.search(
    index: 'cms_content', // Replace with your index name
    query:
      multi_match:
        query: searchTerm,
        fields: ['title', 'description', 'content'],
        fuzziness: 'AUTO' // Optional: Enable fuzzy matching


  );
  return body.hits.hits;
- Display Results: Format and display the search results from Elasticsearch to the user.
- Advanced Features: Consider implementing advanced features such as:
- Faceting and filtering: Allowing users to filter results by category, date, or other criteria.
- Autocomplete: Providing suggestions as the user types.
- Relevance ranking: Using Elasticsearch’s scoring capabilities to prioritize the most relevant results.
Deploying the CMS
Deploying your Express.js Content Management System (CMS) to a production environment is a crucial step, transforming your local development into a live, accessible application. This involves configuring the server, managing processes, and considering scalability to ensure your CMS performs reliably under real-world traffic. The following sections detail the steps and considerations for a successful deployment.
Production Server Configuration
Configuring your server for production use involves several key steps to ensure optimal performance, security, and stability. This includes setting up the server environment, installing necessary dependencies, and configuring the application to run correctly.
- Choosing a Hosting Provider: Select a hosting provider that meets your CMS’s needs. Consider factors like server location (for latency), storage capacity, bandwidth, and pricing. Popular choices include:
- Cloud Platforms: AWS (Amazon Web Services), Google Cloud Platform (GCP), and Microsoft Azure offer scalable infrastructure, various services, and extensive configuration options. They are ideal for applications that require high availability and can handle fluctuating traffic.
- Virtual Private Servers (VPS): Providers like DigitalOcean, Vultr, and Linode offer VPS instances, providing more control over the server environment at a lower cost than cloud platforms. They are suitable for projects with moderate traffic and specific configuration requirements.
- Shared Hosting: While the least expensive, shared hosting might not be suitable for a CMS due to limited resources, lack of control, and potential security concerns. It’s generally not recommended for production environments.
- Server Setup: Once you have chosen a provider, provision a server instance. This usually involves selecting an operating system (e.g., Ubuntu, CentOS), choosing a server size (CPU, RAM, storage) based on your expected traffic and content volume, and configuring network settings (firewall, domain name).
- Installing Dependencies: Install Node.js and npm (Node Package Manager) on the server. You may also need to install other dependencies such as a database server (e.g., PostgreSQL, MySQL, MongoDB) and any system-level libraries required by your CMS. For example, if you are using ImageMagick for image processing, you will need to install it on the server.
- Configuring Environment Variables: Set up environment variables for sensitive information like database credentials, API keys, and secret keys. This is crucial for security and allows you to change configurations without modifying the codebase. Common ways to manage environment variables include:
- Using a `.env` file: Create a `.env` file in your project root to store environment variables. Install the `dotenv` package (`npm install dotenv`) to load these variables into `process.env`.
Remember to add `.env` to your `.gitignore` file to prevent it from being committed to version control.
- Using the server’s environment: Most hosting providers allow you to set environment variables directly on the server. This is a more secure approach, as it avoids storing sensitive information in files.
- Using a `.env` file: Create a `.env` file in your project root to store environment variables. Install the `dotenv` package (`npm install dotenv`) to load these variables into `process.env`.
- Code Deployment: Deploy your CMS code to the server. This typically involves:
- Using Git: Clone your Git repository to the server. This allows for easy updates and version control.
- Using a deployment tool: Tools like Capistrano or DeployHQ automate the deployment process, including tasks like code transfer, dependency installation, and server restarts.
- Manually uploading files: If you’re not using Git or a deployment tool, you can upload your code via FTP or SFTP.
- Database Configuration: Ensure your database server is properly configured for production. This includes:
- Setting up database users and permissions: Create a dedicated database user with limited privileges to access the database.
- Configuring database backups: Implement a regular backup strategy to protect your data from loss.
- Optimizing database performance: Tune database settings and indexes to improve query performance.
- Reverse Proxy Configuration (Optional but recommended): Set up a reverse proxy like Nginx or Apache to handle incoming HTTP requests. A reverse proxy can improve performance, enhance security, and simplify SSL/TLS configuration. It acts as an intermediary between the client and your Express.js application. This is crucial for handling HTTPS traffic and can also provide features like load balancing and caching.
Process Management with PM2
Using a process manager like PM2 is essential for running your Express.js application reliably in production. PM2 provides features like automatic restarts, process monitoring, and load balancing, ensuring your application remains available even if it crashes or encounters errors.
- Installing PM2: Install PM2 globally on your server using npm:
npm install -g pm2 - Starting Your Application: Start your Express.js application using PM2:
pm2 start app.js --name "my-cms"Replace `app.js` with the entry point of your application and `”my-cms”` with a descriptive name.
- Monitoring Your Application: Monitor your application’s performance and status using PM2:
pm2 statusThis command displays information about your running processes, including CPU usage, memory usage, and restart counts.
- Managing Your Application: PM2 offers various commands for managing your application:
pm2 restart my-cms: Restarts the application.pm2 stop my-cms: Stops the application.pm2 delete my-cms: Deletes the application from PM2’s management.pm2 logs my-cms: Displays the application logs.
- Automatic Startup on Server Boot: Configure PM2 to automatically start your application when the server boots:
pm2 startupThis command generates a startup script for your system (e.g., systemd for Ubuntu) and configures PM2 to start your application automatically.
- Load Balancing (if applicable): PM2 supports load balancing, allowing you to run multiple instances of your application across multiple CPU cores to handle increased traffic.
pm2 start app.js -i max --name "my-cms"The `-i max` flag tells PM2 to start one instance per CPU core.
Scaling the CMS
Scaling your CMS is crucial for handling increased traffic and ensuring a smooth user experience as your website grows. This involves optimizing your application, database, and infrastructure to handle a larger volume of requests.
- Optimizing Code and Database Queries: Optimize your code for performance. This includes:
- Caching: Implement caching mechanisms (e.g., using Redis or Memcached) to store frequently accessed data and reduce database load.
- Database Query Optimization: Review and optimize database queries to ensure they are efficient. Use indexes appropriately and avoid unnecessary joins.
- Code Profiling: Use profiling tools (e.g., Node.js profiler) to identify performance bottlenecks in your code.
- Horizontal Scaling: Deploy multiple instances of your application behind a load balancer. This allows you to distribute traffic across multiple servers, improving performance and availability.
For example, if you anticipate a significant increase in traffic, you could start with two server instances and scale up as needed. A load balancer (e.g., Nginx, HAProxy) would then distribute incoming requests across these instances.
- Database Scaling: Scale your database to handle increased read and write loads. This may involve:
- Database Replication: Set up database replication to create read replicas. Read replicas can handle read-heavy workloads, reducing the load on the primary database.
- Database Sharding: If your data volume is extremely large, consider database sharding, which involves splitting your database into multiple smaller databases (shards).
- Content Delivery Network (CDN): Use a CDN to serve static assets (images, CSS, JavaScript) from servers closer to your users. This reduces latency and improves page load times.
- Monitoring and Alerting: Implement monitoring and alerting to track your CMS’s performance and identify potential issues. Use tools like Prometheus, Grafana, or New Relic to monitor metrics like CPU usage, memory usage, database query times, and error rates. Set up alerts to notify you when performance thresholds are exceeded.
- Caching Strategies: Employ different caching strategies to improve performance:
- Server-side Caching: Cache frequently accessed data on the server (e.g., using Redis or Memcached).
- Client-side Caching: Leverage browser caching to store static assets (images, CSS, JavaScript) on the client’s device.
- CDN Caching: Utilize a CDN to cache static assets and serve them from edge locations.
Security Best Practices
Implementing robust security measures is paramount when developing a CMS with Express.js. This ensures the protection of user data, prevents unauthorized access, and maintains the integrity of the system. Failure to address security vulnerabilities can lead to severe consequences, including data breaches, reputational damage, and legal liabilities. This section Artikels critical security practices to fortify your Express.js CMS.
Common Security Vulnerabilities in CMS Applications
CMS applications, being dynamic web applications, are susceptible to a range of security vulnerabilities. Understanding these vulnerabilities is the first step towards building a secure CMS.
- SQL Injection: This occurs when an attacker injects malicious SQL code into database queries. If successful, the attacker can potentially access, modify, or delete sensitive data stored in the database. For example, consider a login form that uses the following vulnerable SQL query:
      SELECT

- FROM users WHERE username = '$username' AND password = '$password';
An attacker could inject code into the ‘username’ field, such as `’ OR ‘1’=’1`, to bypass authentication.
- Cross-Site Scripting (XSS): XSS attacks involve injecting malicious scripts into web pages viewed by other users. Attackers can steal user cookies, redirect users to malicious websites, or deface the website. There are three main types of XSS: reflected, stored, and DOM-based. For instance, a reflected XSS vulnerability might occur if user-supplied data, like a search query, isn’t properly sanitized before being displayed on the page.
- Cross-Site Request Forgery (CSRF): CSRF attacks force an authenticated user to submit a malicious request to a web application. The attacker tricks the user’s browser into sending a forged request, which can perform actions on the user’s behalf without their knowledge or consent. For example, a CSRF attack could be used to change a user’s password or make unauthorized purchases.
- Broken Authentication and Session Management: Weak authentication mechanisms, such as easily guessable passwords or insufficient session management, can allow attackers to gain unauthorized access to user accounts. This includes vulnerabilities like weak password storage (e.g., storing passwords in plain text or using weak hashing algorithms), session fixation attacks, and session hijacking.
- Insecure Direct Object References: This occurs when an application provides direct access to objects based on user-supplied input. An attacker can manipulate the object identifiers to access unauthorized resources or data. For example, if a CMS allows users to access files using a URL like `/files/123`, an attacker might try `/files/124` to see if they can access another user’s file.
- Security Misconfiguration: This refers to improperly configured servers, frameworks, or applications. This can include leaving default credentials unchanged, enabling unnecessary features, or failing to update software regularly.
- Insufficient Input Validation: Failure to validate user input can lead to various vulnerabilities, including SQL injection, XSS, and command injection. Without proper validation, attackers can inject malicious code or data into the application.
- Use of Components with Known Vulnerabilities: Using outdated or vulnerable libraries and frameworks can expose the CMS to known exploits. Regularly updating all dependencies is crucial for security.
Securing the Express.js CMS
Securing an Express.js CMS requires a proactive approach, incorporating various techniques and best practices.
- Preventing SQL Injection: To prevent SQL injection, use parameterized queries or prepared statements with your database interactions. This ensures that user-supplied data is treated as data and not as executable code. Avoid directly concatenating user input into SQL queries.
      // Vulnerable code (SQL injection risk)

      const username = req.body.username;

      const password = req.body.password;

      db.query(`SELECT

- FROM users WHERE username = '$username' AND password = '$password'`, (err, results) =>  ...
);
// Safe code (using prepared statements)
const username = req.body.username;
const password = req.body.password;
db.query('SELECT
- FROM users WHERE username = ? AND password = ?', [username, password], (err, results) => ... );
- Preventing Cross-Site Scripting (XSS): Implement output encoding to prevent XSS attacks. This involves escaping user-supplied data before it is displayed in the browser. Use libraries like `express-validator` or `xss` to sanitize user input and HTML.
      const  sanitize  = require('express-validator');

      app.post('/comment', (req, res) =>

        const comment = sanitize(req.body.comment).escape(); // Sanitize the comment

        // ...
save comment to database
);
- Preventing Cross-Site Request Forgery (CSRF): Implement CSRF protection by using CSRF tokens. These tokens are unique, secret, and unpredictable values generated by the server and included in forms. The server verifies the token when a form is submitted to ensure the request originates from the user’s browser and not from a malicious site. Libraries like `csurf` can help with CSRF protection in Express.js.
- Implementing Secure Authentication: Use strong password hashing algorithms (e.g., bcrypt, Argon2) to securely store passwords. Never store passwords in plain text. Enforce strong password policies (e.g., minimum length, character requirements). Implement multi-factor authentication (MFA) for added security.
- Implementing Secure Session Management: Secure session management is crucial to prevent session hijacking. Use secure cookies (e.g., `HttpOnly` and `Secure` flags) to protect session identifiers. Regenerate session IDs after login and logout. Implement session timeouts and regularly invalidate idle sessions.
- Validating and Sanitizing Input: Validate all user input on both the client-side and server-side. Sanitize user input to remove or neutralize potentially harmful characters or code. Use input validation libraries to simplify this process.
- Implementing Authorization: Implement role-based access control (RBAC) to restrict access to sensitive resources based on user roles. Define clear access control rules to limit what users can do within the CMS.
- Keeping Dependencies Updated: Regularly update all dependencies, including Express.js, middleware, and other libraries, to patch known security vulnerabilities. Automated dependency management tools can help streamline this process.
- Using HTTPS: Always use HTTPS to encrypt communication between the client and server. This protects data in transit from eavesdropping and tampering. Obtain an SSL/TLS certificate from a trusted Certificate Authority (CA).
- Monitoring and Logging: Implement comprehensive logging to track user activity, errors, and security events. Regularly monitor logs for suspicious activity and potential security breaches. Implement an intrusion detection system (IDS) or intrusion prevention system (IPS) to detect and prevent malicious activity.
Security Libraries and Best Practices for Protecting User Data
Leveraging security libraries and adhering to best practices are essential for protecting user data in an Express.js CMS.
- Helmet: Helmet is a collection of middleware for Express.js that helps secure your apps by setting various HTTP headers. It helps mitigate common web vulnerabilities. For example, it can set the `X-Frame-Options` header to prevent clickjacking attacks, the `X-XSS-Protection` header to enable the browser’s XSS filter, and the `Content-Security-Policy` header to control the resources the browser is allowed to load.
- express-validator: `express-validator` is a middleware for validating and sanitizing user input. It allows you to define validation rules for different data types and fields. This library helps prevent vulnerabilities like SQL injection and XSS by ensuring that user-supplied data conforms to the expected format and doesn’t contain malicious code.
- bcrypt or Argon2: Use a strong password hashing algorithm like bcrypt or Argon2 to securely store user passwords. These algorithms add salt and computational complexity to the password hashing process, making it significantly harder for attackers to crack passwords even if the database is compromised.
- csurf: `csurf` is a middleware for protecting against CSRF attacks. It generates CSRF tokens and validates them on form submissions. This prevents attackers from tricking users into submitting malicious requests to your CMS.
- Rate Limiting: Implement rate limiting to prevent brute-force attacks and denial-of-service (DoS) attacks. Rate limiting restricts the number of requests a user can make within a specified time frame. Libraries like `express-rate-limit` can be used to implement rate limiting in your Express.js application. For example, to limit a route to 100 requests per 15 minutes:
const rateLimit = require('express-rate-limit');const limiter = rateLimit(
windowMs: 15
- 60
- 1000, // 15 minutes
max: 100, // limit each IP to 100 requests per windowMs
message: 'Too many requests from this IP, please try again after 15 minutes'
);app.use('/api/', limiter); // Apply rate limiting to all routes starting with /api/
- Regular Security Audits and Penetration Testing: Conduct regular security audits and penetration testing to identify and address vulnerabilities in your CMS. These assessments can help you proactively identify and fix security flaws before attackers can exploit them. Consider using automated security scanners and engaging with security professionals.
- Educating Developers: Educate developers about secure coding practices and common security vulnerabilities. Promote a security-conscious culture within your development team. Implement code reviews to ensure that security best practices are followed.
- Data Encryption: Encrypt sensitive data at rest and in transit. Use encryption libraries to protect sensitive information like passwords, API keys, and other confidential data. Consider using encryption for database backups as well.
- Vulnerability Scanning: Implement vulnerability scanning as part of your development and deployment pipeline. Tools like OWASP ZAP or commercial vulnerability scanners can help identify potential security flaws in your application. This allows you to proactively address vulnerabilities before they can be exploited.
Performance Optimization

Optimizing your CMS for performance is critical for providing a positive user experience, improving , and ensuring the scalability of your application. A slow CMS can lead to frustrated users, decreased search engine rankings, and ultimately, a loss of business. Performance optimization involves a multifaceted approach, focusing on the database, server-side code, and the frontend. It’s an ongoing process, requiring continuous monitoring and refinement.
Optimizing Database Queries
Database queries are often the bottleneck in CMS performance. Efficiently retrieving data from the database is paramount. Poorly optimized queries can lead to slow page load times and increased server load.
To optimize database queries, consider the following strategies:
- Indexing: Create indexes on frequently queried columns, such as those used in WHERE clauses and JOIN conditions. Indexes speed up data retrieval by allowing the database to quickly locate the relevant rows. For example, if you frequently search for posts by their author ID, create an index on the ‘author_id’ column in your ‘posts’ table.
- Query Optimization: Analyze and optimize your SQL queries. Use query profiling tools to identify slow queries. Avoid using SELECT
-; instead, specify the exact columns you need. - Database Schema Design: Design your database schema with performance in mind. Normalize your data to reduce redundancy and improve data integrity. Choose appropriate data types for your columns. For example, use the smallest integer type that can accommodate your data.
- Caching Query Results: Implement query caching to store the results of frequently executed queries. This can significantly reduce the load on your database and improve response times. Frameworks like Sequelize (for Node.js) offer built-in caching capabilities or can be integrated with external caching solutions like Redis or Memcached.
- Connection Pooling: Use connection pooling to manage database connections efficiently. Connection pooling reuses existing database connections instead of creating new ones for each request, reducing overhead.
Implementing Caching Mechanisms
Caching is a fundamental technique for improving page load times and reducing server load. It involves storing frequently accessed data in a faster storage location, such as memory or a content delivery network (CDN).
Implementing caching mechanisms in your CMS can significantly improve performance. Here’s how:
- Server-Side Caching: Cache dynamically generated content on the server. This can be achieved using various caching libraries or middleware. For instance, you can use the `express-cache-middleware` package in Express.js to cache responses based on their URL.
- Client-Side Caching: Utilize browser caching to store static assets, such as CSS, JavaScript, and images, on the client’s device. This reduces the number of requests to the server and speeds up page load times for returning visitors. Configure appropriate HTTP headers (e.g., `Cache-Control`, `Expires`) to control the caching behavior.
- CDN Integration: Use a CDN to distribute your content across multiple servers geographically. This allows users to access your content from the server closest to their location, reducing latency. CDNs are particularly beneficial for serving images, videos, and other large files. Popular CDN providers include Cloudflare, Amazon CloudFront, and Akamai.
- Object Caching: Cache frequently accessed data objects, such as database query results or user session data. Libraries like Redis or Memcached are excellent choices for object caching, providing fast in-memory storage. For example, after retrieving a list of blog posts from the database, store the results in Redis with a time-to-live (TTL) to prevent stale data.
- Fragment Caching: Cache individual fragments of a page, such as the navigation menu or the sidebar. This allows you to cache parts of a page that don’t change frequently, while dynamically generating the rest.
Customization and Extensibility
A key advantage of building a CMS with Express.js is the ability to customize and extend its functionality. This flexibility allows developers to tailor the CMS to meet specific project requirements, integrate with third-party services, and evolve the system over time. Customization ensures that the CMS aligns precisely with the content management needs, while extensibility guarantees that it can adapt to changing demands.
Extending the CMS with Custom Modules and Plugins
The modular design of Express.js, combined with the ability to create plugins, facilitates significant customization. This approach allows developers to add features without modifying the core CMS code, thus improving maintainability and reducing the risk of breaking existing functionality.
To extend the CMS, developers can create custom modules or plugins. These extensions typically encompass the following aspects:
- Custom Modules: These are self-contained units of functionality, such as a custom content type or a specialized form processing component. Modules are designed to address specific needs within the CMS, and they often integrate with existing CMS features. For instance, a custom module could handle the creation and management of event listings, providing fields for event dates, locations, and ticket information.
- Plugins: Plugins are designed to hook into the CMS’s core processes, allowing developers to modify or extend the behavior of existing features. Plugins are frequently used for tasks like adding custom validation rules to form submissions, integrating with external APIs, or altering the CMS’s user interface. A plugin might, for example, automatically resize images uploaded to the media library, or integrate a social media sharing feature for content pages.
Creating a Custom Plugin for a Specific CMS Feature
Let’s consider an example of creating a custom plugin to add a “related articles” section to a content page within the CMS. This plugin would analyze the content of the current article and suggest relevant articles based on s or tags.
Here’s a simplified illustration of how such a plugin might work:
- Plugin Structure: The plugin would consist of a file (e.g., `related-articles.js`) and a configuration file (e.g., `related-articles.config.json`).
- Plugin Initialization: The CMS would load and initialize the plugin during startup, typically by reading its configuration and registering any necessary routes or middleware.
- Content Analysis: The plugin would access the content of the current article and extract s or tags.
- Related Article Retrieval: Using the extracted s, the plugin would query the CMS’s database to find other articles that share those s.
- Display of Related Articles: The plugin would generate the HTML for the “related articles” section and inject it into the content page.
Here’s a simplified code snippet to illustrate a basic plugin structure:
“`javascript
// related-articles.js
module.exports = function(app, config)
// Access the content of the current article
app.get(‘/article/:slug’, (req, res) =>
// Assuming the article data is retrieved from the database
// Extract s from the article
// Query the database for related articles
// Render the page with the related articles section
);
;
“`
In this example, the plugin registers a route that intercepts requests for article pages. When a request is made, the plugin analyzes the article content, finds related articles, and adds a section to the page displaying the related articles. This approach allows for flexible addition of functionality.
Implementing Hooks or Events for Greater Flexibility
Hooks and events are critical for achieving extensibility. They allow developers to intercept and modify the CMS’s behavior at various points in the execution flow. This is typically implemented through an event-driven architecture.
- Hooks: Hooks are predefined points in the CMS’s code where custom code can be executed. They provide a straightforward mechanism for extending functionality.
- Events: Events are triggered at specific points in the CMS’s operation, such as when a user creates a new content item or updates an existing one. Plugins can subscribe to these events and execute custom logic when the event occurs.
Consider a scenario where a developer wants to automatically send an email notification when a new article is published. Using hooks or events, the developer can achieve this without modifying the core publishing process.
Here’s an example of how events might be implemented:
“`javascript
// Event emitter (e.g., using the ‘events’ module)
const EventEmitter = require(‘events’);
const eventEmitter = new EventEmitter();
// Triggering an event when an article is published
eventEmitter.emit(‘article.published’, articleData);
// A plugin subscribing to the event
eventEmitter.on(‘article.published’, (article) =>
// Send an email notification
console.log(`Sending email notification for article: $article.title`);
);
“`
In this example, the `eventEmitter` is used to trigger an event (`article.published`) when an article is published. The plugin then subscribes to this event and executes code to send an email notification. This approach allows for the addition of custom behavior without modifying the core publishing logic.
By using hooks and events, developers can create a highly flexible and extensible CMS that can be adapted to meet the evolving needs of any project. This ensures that the CMS remains adaptable to future requirements and integrations.
Wrap-Up
In conclusion, this guide has illuminated the path to building a custom CMS with Express.js, from initial setup to advanced features. By mastering the concepts of content modeling, user management, and performance optimization, you’re now well-equipped to create a tailored CMS that meets your unique requirements. Embrace the power of customization and extensibility, and remember that the journey of building a CMS is one of continuous learning and refinement.
Happy coding!